How to install Auto Feeder Helmet Mod 1.16.5/1.15.2 (Keeping You Saturated)
Follows 5 Steps bellow to install Auto Feeder Helmet Mod 1.16.5/1.15.2 on Windows and Mac :
1. You need ready installed Minecraft Forge.
2. Download a Forge compatible mod from url download, or anywhere else!
3. Open Minecraft, click ->> ‘Mods’ button on the main menu, click – >> ‘Open Mods Folder’.Important: Some older versions of Forge may not have the ‘Open Mods Folder’ button. If that is the case, you need to find the folder manually. Windows:
- Press the Windows key and R at the same time
- Type %appdata% and press enter
- Find the Minecraft folder and then look for the Mods folder within that
Mac:
- Click on the desktop and then press Command+Shift+G all at the same time
- Type ~/Library and press enter
- Open the folder Application Support and then Minecraft
4. Place the mod file downloaded (.jar or .zip) into the Mods folder.
5. Relaunch Minecraft, and you should now see the new mod installed in the list!
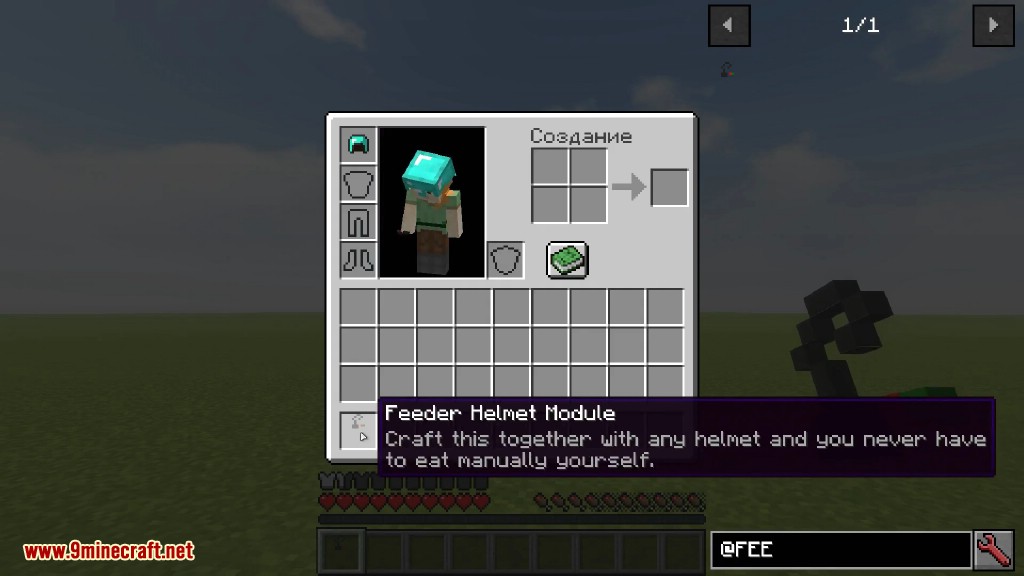
Screenshot :

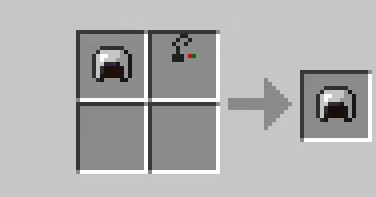
Once crafted you put it into a crafting grid with any helmet (modded or vanilla) and it will show “Auto feeding mode” in its GUI:
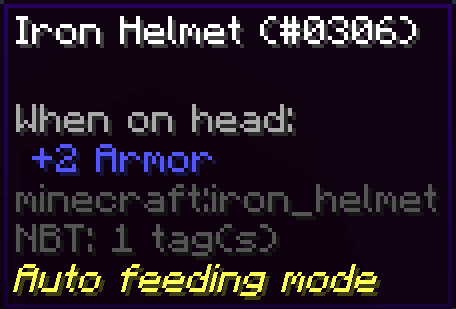
Auto feeding mode
Crafting Recipes:
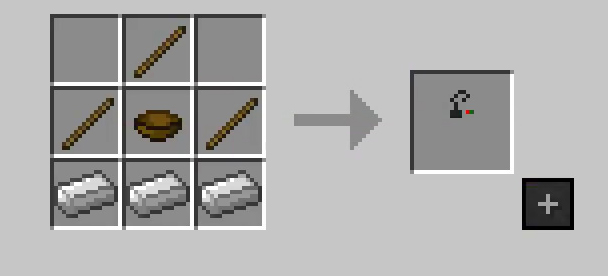
Requires:
Auto Feeder Helmet Mod 1.16.5/1.15.2 Download Links:
For Minecraft 1.15.2
For Minecraft 1.16.1
For Minecraft 1.16.2
For Minecraft 1.16.3
For Minecraft 1.16.4
For Minecraft 1.16.5
Top 13 Best Minecraft 1.16 Mods download & 1.16.1 Mods (September 2020)