How to install FPS Reducer Mod 1.17.1 / 1.16.5 / 1.15.2 (Reduce Unnecessary GPU and CPU Load)
Follows 5 Steps bellow to install FPS Reducer Mod on Windows and Mac :
1. You need ready installed Minecraft Forge.
2. Download a Forge compatible mod from url download, or anywhere else!
3. Open Minecraft, click ->> ‘Mods’ button on the main menu, click – >> ‘Open Mods Folder’.Important: Some older versions of Forge may not have the ‘Open Mods Folder’ button. If that is the case, you need to find the folder manually. Windows:
- Press the Windows key and R at the same time
- Type %appdata% and press enter
- Find the Minecraft folder and then look for the Mods folder within that
Mac:
- Click on the desktop and then press Command+Shift+G all at the same time
- Type ~/Library and press enter
- Open the folder Application Support and then Minecraft
4. Place the mod file downloaded (.jar or .zip) into the Mods folder.
5. Relaunch Minecraft, and you should now see the new mod installed in the list!
- Top 10 Best Java Seeds 1.16.5 and 1.17.1 for Minecraft (August 2021)
- Top 10 Best Minecraft Seeds 1.17.1 Caves & Cliffs – All Platform
This mod reduces unnecessary GPU and CPU load by reducing the frame rate automatically when you are not operating Minecraft for a certain period of time.
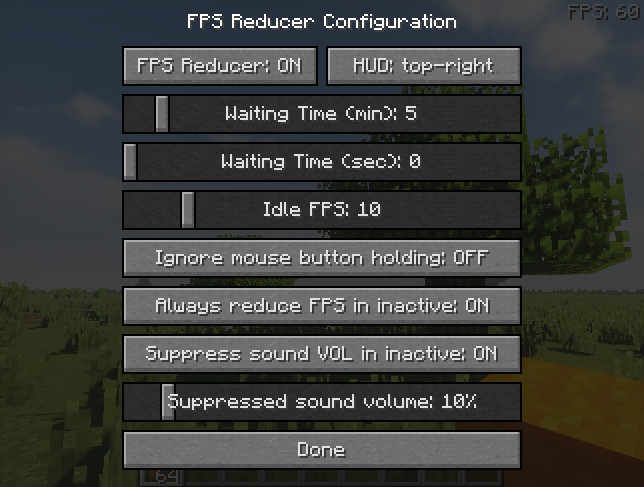
Screenshot :

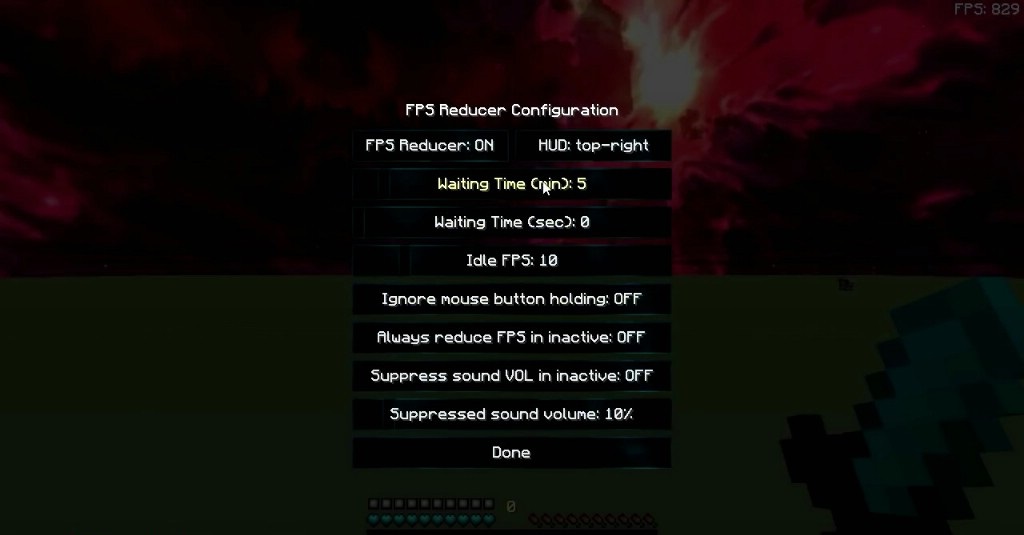
How to use:
- By default, if there is no operation for 5 minutes the frame rate will drop to 10.
- Pressing [END] key opens the configuration GUI by default.
Requires:
Minecraft Forge
Chunk Animator Mod (Recommended)
FPS Reducer Mod 1.17.1 / 1.16.5 / 1.15.2 Download Links
Features
- Reduce FPS automatically under the following conditions.
– No user operation for the specified time.
– The game window is inactive or minimized. - Suppress sound volume if the game window is inactive or minimized.
- Display the current FPS on the screen edge.