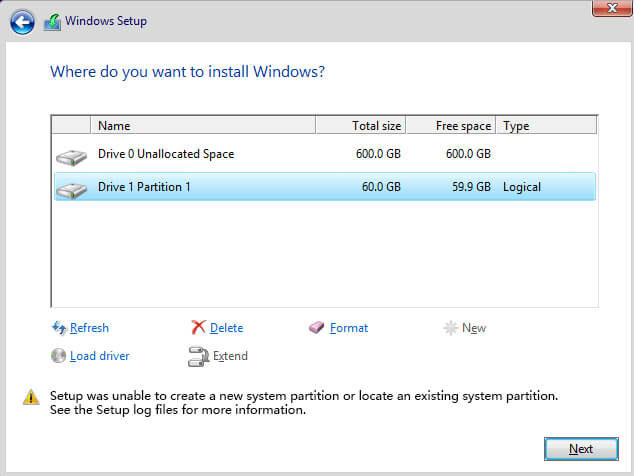
Problem : How to Fix the error “Setup was unable to create a new system partition or locate an existing system partition”
If you receive this error message: “Setup was unable to create a new system partition or locate an existing system partition” while installing Windows 7, 8 / 8.1, 10, follow the steps to fix it .
Solution : How to Fix the error “Setup was unable to create a new system partition or locate an existing system partition”
1. First, make sure that any external hard drive is removed from the computer.
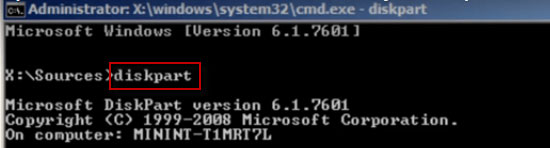
2. Now, press Shift + F10 to open Command Prompt.
3. In the Command Prompt window, type “diskpart” and press Enter.
4. Next type “list disk“. It will list all hard drives connected to your PC.
For example, only one drive . We will install Windows on this hard drive.
5. Type “select disk 0” to select the hard. You can choose another partition if you like.
6. Now, type “clean” to wipe all data from the drive.
7. After you finish, type “create partition primary size-10000“.
8. Now, type “format fs = ntfs quick“.
9. Once done, type “assign” and press the Enter key.
10. Then type “active” and press Enter.
11. Now, type “list volume” to list the partition or drive. It will display the partition you have just created.
12. Now, we will copy the contents of the Windows boot CD drive into drive C.
13. Type Exit and then press Enter.
14. Go to the CD drive by typing “cd e:” and pressing Enter.
15. Now, type “xcopy e: c: / e / h / k“, then press Enter. It starts copying the installation files from the CD drive to the C drive. It will take some time to copy.
16. Once done, type “exit” and press Enter. Now close all open windows and then restart the computer. After rebooting, the machine will begin to install Windows.
17. Now, you have the option to create a partition for the allocated space.
Once Windows has been installed, you need to edit the boot loader. To remove this black screen from the boot process, follow the steps below.
1. Run the Command Prompt with admin permission.
2. Type bcdedit and then press Enter.
3. Locate the content “Description” and “Identifier“.
4. Enter “bcdedit / delete (74253dcc9-effasdrc50-3582tvple-5263tlpt-5223thpf)“, then press Enter.
5. Restart the computer.


