Project data comes in handy in lots of other programs. For example, a Project schedule shows project status whether it appears in a PowerPoint slide, a Word-based status report, or an Excel spreadsheet. Similarly, you might embed a Resource Graph into a memo requesting resources. This section describes how to link and embed Project data into other programs.
1. Linking Project Files to Other Programs
Sometimes, pictures of Project views aren’t enough. You might want the Gantt Chart in your status report to show the up-to-date project schedule. When you link a Project file to another program, the linked object initially displays the portion of the view that you copied in Project. Once the linked object is in place, you can edit it to change the view, filter the tasks, and so on.
Note:
Office programs can be fussy about linking objects, but the box on When Programs Won’t Link provides a workaround.
Here’s how you link a Project file to another program:
-
Open the Project file and the destination file.
You can link to a Project view in any program that supports OLE, including Excel, Word, and PowerPoint.
-
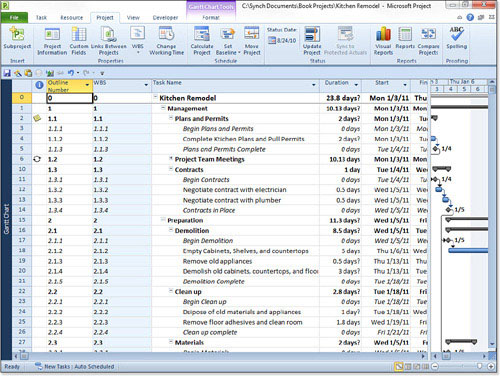
In Project, set up the view the way you want it.
Select the view and the table you want. If necessary, insert or hide columns in the table. Filter the view to show only the tasks, resources, or assignments you want.
-
Select the data you want to link, and then, on the Task tab, click Copy (or press Ctrl+C).
Whether you select cells in a table or entire rows by dragging over their ID numbers, the Copy command places what you’ve selected on the Clipboard.
-
In the destination file, click where you want to place the linked view.
Unlike pasting table cells, a view comes in as one object with its top-left corner at the location you click.
-
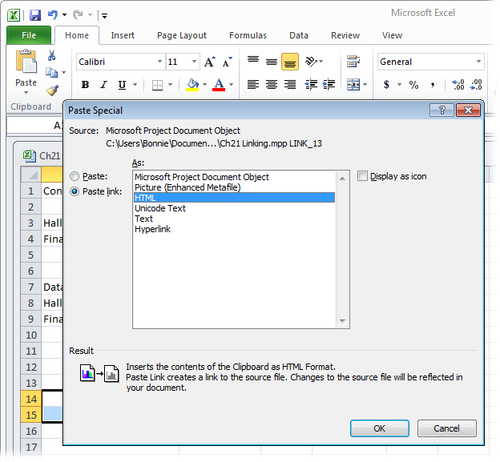
In the Paste Special dialog box, select the “Paste link” option, as illustrated in Figure 1.
Be sure to select Paste Link, since the Paste option embeds the object instead of linking it. If the Paste Link option is grayed out, be sure to save the Project file, and then recopy and try Paste Link again.
Figure 1. Turn on the “Display as icon” checkbox to show an icon instead of the entire linked object. When you want to see the linked information, double-click the icon.
-
In the As list, select Microsoft Project Document Object, and then click OK.
The Project view appears as a single object in the destination file. You can move the linked object around by dragging from the center of the object. To resize the object, select it, and then drag the boxes at the corners and the middle of each side.
Troubleshooting Moment: When Programs Won’t LinkIf your Office 2010 programs like Excel are reluctant to create links, the problem could be your security settings. For example, you’ve copied Project data to the Clipboard, but in Excel, the Paste Link command (or the Paste Link option in the Paste Special dialog box) is grayed out. Here’s how you tell Excel to play well with others:
|
2. Embedding Project Files in Other Programs
Embedding Project data into another program creates a copy of your project in the destination file. Embedding data creates a self-contained file—for example, for the subcontractors who can’t access your computer systems. If you send them status reports with linked objects, they would see broken links, not data.
You can create objects to embed as you go, as the box on Creating Objects from Scratch describes. However, creating a Project file on the fly is a bad idea, because that file is available only within the destination file. By creating the file in Project, you can embed the file and keep the original to work with.
To embed a Project file in another program, follow these steps:
-
Open the destination file, and then select the location where you want to embed your Project object.
Project doesn’t have to be running to embed a Project file.
-
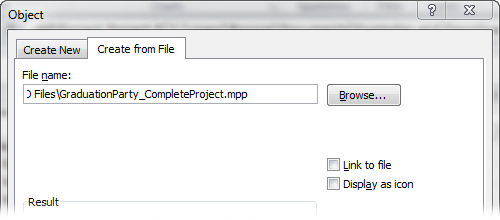
Select the “Create from File” tab, and then select the file you want to embed.
To locate the file, click Browse. In the Browse window, navigate to the folder that contains your Project file, and then double-click the filename. The path and filename appear in the “File name” box, as shown in Figure 2.
Figure 2. You can turn an embedded file into a linked file in no time flat simply by turning on the “Link to file” checkbox.
-
To show an icon until you want to see the Project file, turn on the “Display as icon” checkbox.
Turning on the “Display as icon” checkbox displays a Change Icon button. In the Change Icon dialog box, you can select the icon you want to show, and the label.
-
Click OK.
The embedded file appears at the selected location in the destination file. If you display an icon for an embedded file, then you can open the file by double-clicking its icon.
3. Linking Project Table Data to Other Programs
You can create links from selected Project table cells directly to cells in another file, like an Excel spreadsheet. When the Project values change, the linked cells in the other program display the updated values. For example, by linking Project cost cells to Excel, a return on investment spreadsheet could show the rate of return at any time—perfect for surprise executive visits.
Linking and copying both work with Project table cells, but linked cells get their values directly from source Project cells. Copying pastes the text or numbers from the source Project cells into destination cells; copied data is the same as values you enter directly.
Note:
You can’t embed a portion of a Project table into another file. If you try, the program embeds the entire Project file instead.
To link Project table cells to cells in a program like Excel, follow these steps:
-
Open both the Project file and the destination file.
For example, open an Excel spreadsheet.
-
In Project, display the table you want to link to Excel.
If necessary, display the view you want. To change the table, right-click the Select All cell (the gray cell at the intersection of the column heading row and the ID column), and then choose the table from the drop-down list. If the table doesn’t appear on the drop-down list, choose More Tables. In the More Tables dialog box, select the table and click Apply.
-
Select the data you want to link, and then choose Task→Copy (or right-click and choose Copy Cell).
Use any of the usual techniques for selecting data: dragging over column headings to select entire columns, dragging from the top-left to the bottom-right cell of a range, or Ctrl-clicking or Shift-clicking cells.
-
In the destination file, click the top-left cell for the linked data.
The data starts at the cell you click, and then fills in cells to the right and below that cell.
-
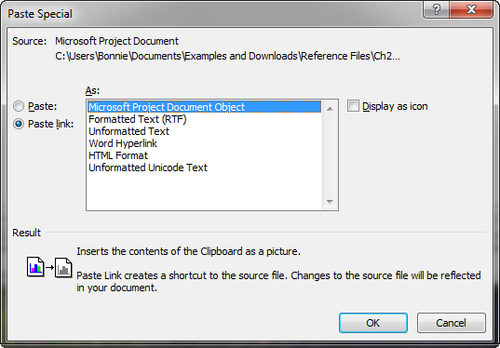
In Excel, choose Home→Clipboard→Paste→Paste Special. In the Paste Special dialog box, select the Paste link option, as shown in Figure 3. Select HTML or Text, and then click OK.
The linked data appears in the selected cells. If you can’t see the full values, adjust the column widths in the destination file.
Figure 3. The command you use to create links depends on the program. For example, in Excel 2010, choose Home→Paste→Paste Special. In Excel 2003, choose Edit→Paste Special. Then, in the Paste Special dialog box, select the Paste Link option, and then, in the As box, select Text. Click OK to add the linked data into the cells.