Scenario/Problem: In some lists, you have permissions to create new views: either personal views (that only you are able to see) or public ones (that everyone is able to view). You now want to create a view that will help you or other users find information in the list or library more easily.
Solution: To create new views, either personal or public, go to either the List ribbon or Library ribbon and click the Create View button in the Manage Views section of the ribbon. You also can click on the three dots next to the view names above the list view. This opens a menu in which you choose the Create View options, as shown in Figure 1.
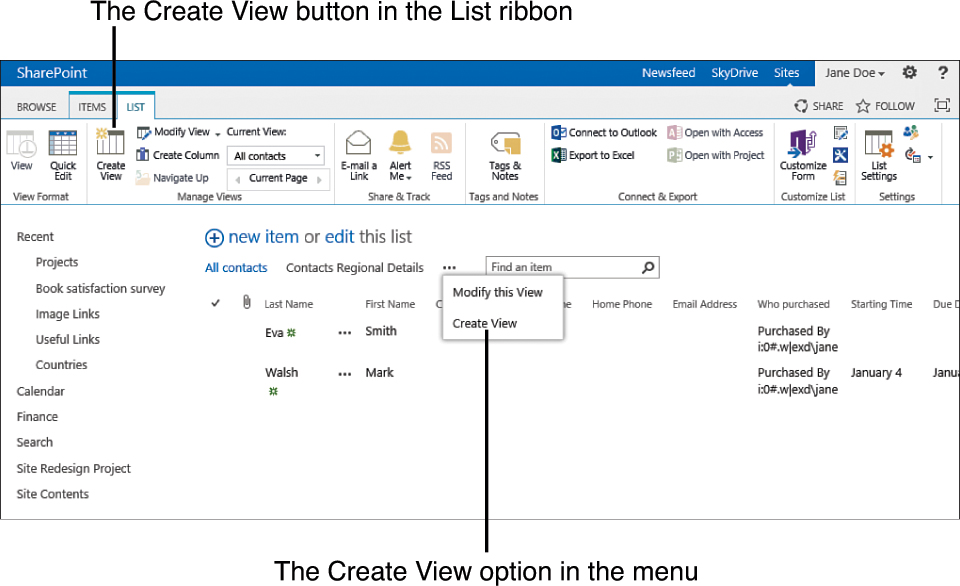
FIGURE 1 Clicking the Create View option.
On the page that opens, choose from a list of available view types (see Figure 2). Different lists can have different types of views. For example, the events list has a special view type for recurring events; this kind of view shows instances of each recurring event as if it were a single event and not relevant to other types of lists.
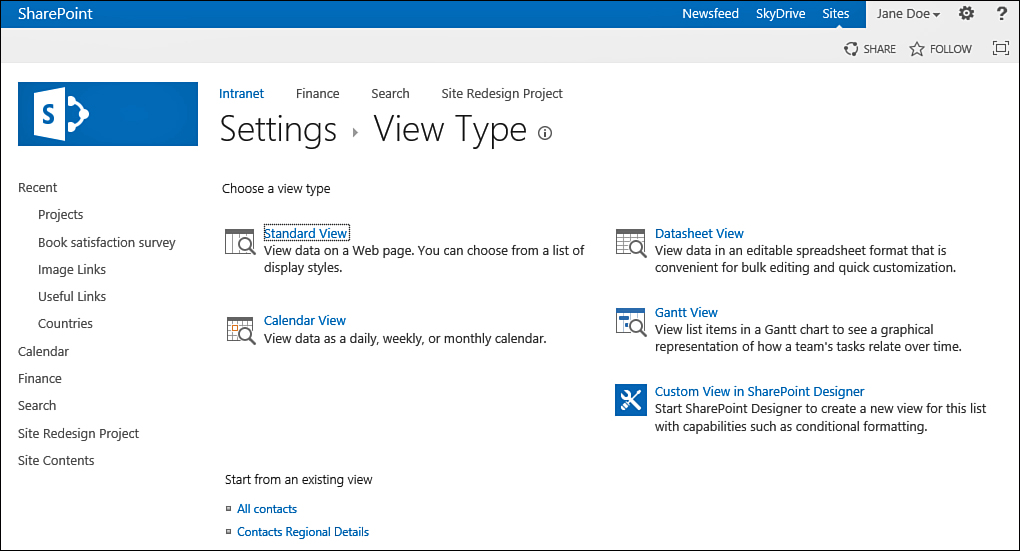
FIGURE 2 The View Type selection page.
Create a Standard View
If you want a standard list view, select the Standard View link. The Create View page that appears enables you to name your view if it is going to be the default view for the list (see Figure 3). You can also select whether it is going to be a public or personal view and choose the settings for the view.
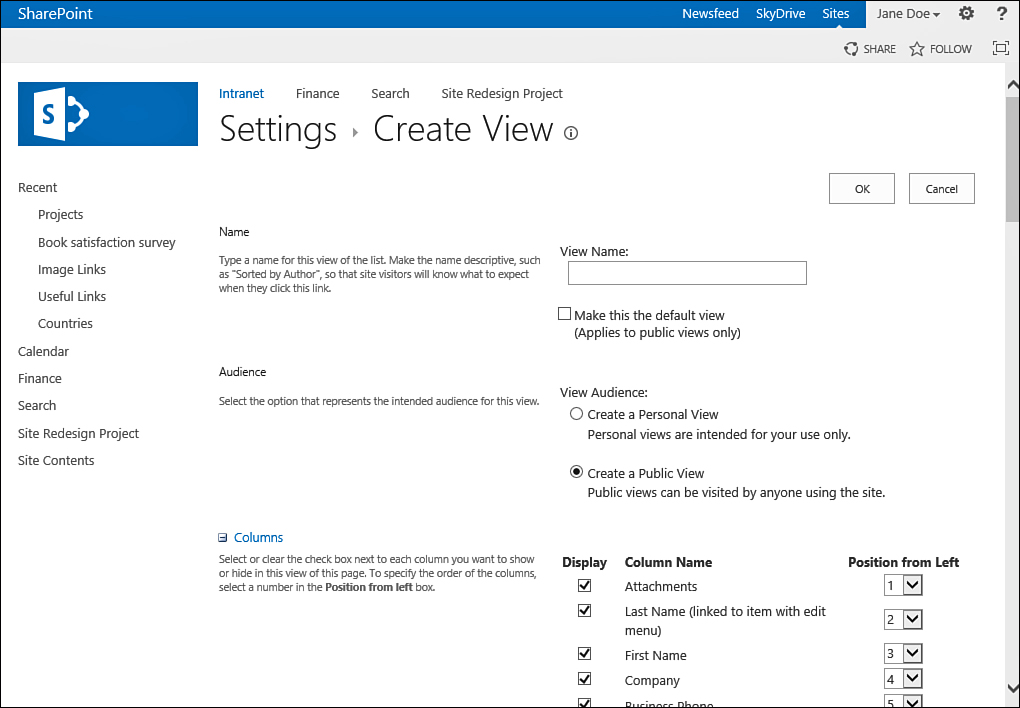
FIGURE 3 The Create View page for a standard view.
Create a Calendar View
Calendar views show information from a list or document library as if this information were events on a calendar. There must be one date column to define as the start date column and one column to define as the end date—the time interval. Having one column to be both the start and end dates is enough. For example, in a document library, you can create a calendar view that shows the documents based on the day they were created (see Figure 4).
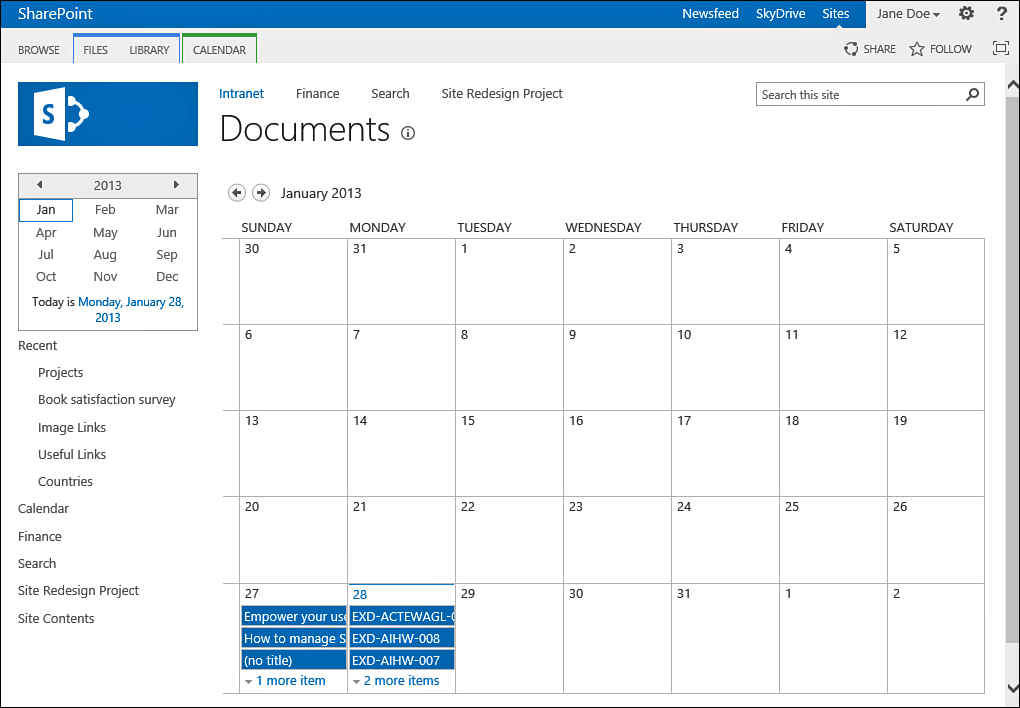
FIGURE 4 A document library with a calendar view based on the Created Date.
To create a calendar view, select the Calendar View type. The first two options in the view setting screen are similar to those of the standard view: naming the view and selecting whether it is going to be a default view and whether it is a personal or public view (refer to Figure 3). Other options are available for Calendar views to specify what column will be used as the start date, end date, and titles, as shown in Figure 5.
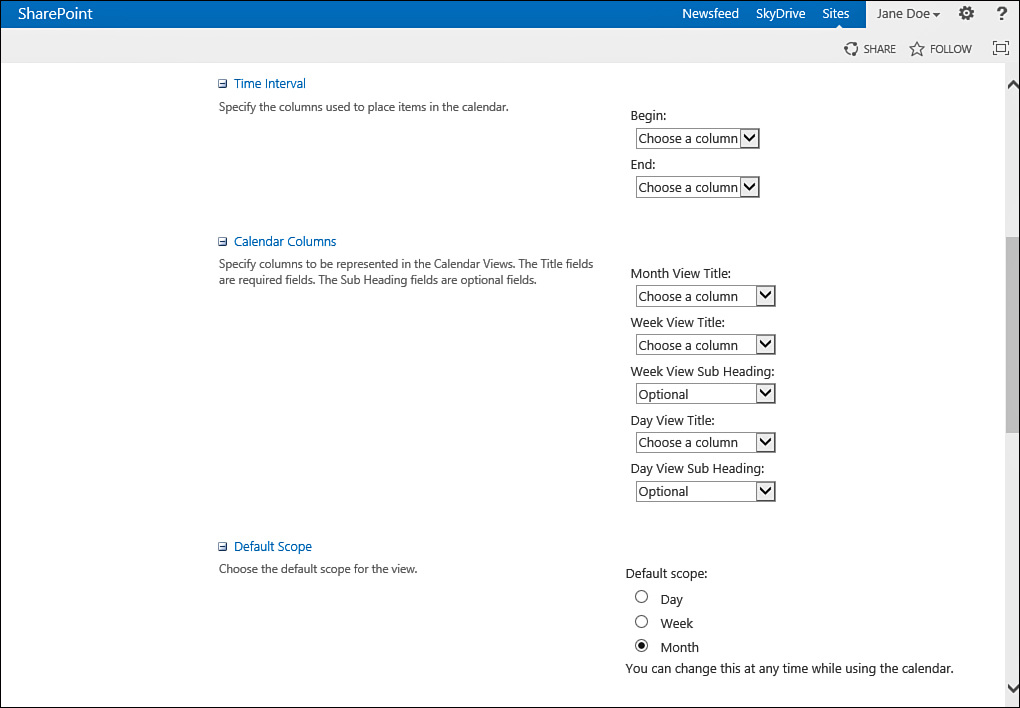
FIGURE 5 Configuring a calendar view based on the Created Date for a document library.
As another example, for a tasks list, you can choose the start date of the task as the start column and the due date as the end column to create a view that shows the tasks in a calendar-style view.
Calendar views have three subviews: the daily view, which shows each day separately (see Figure 6); the weekly view, which shows week by week (see Figure 7); and the monthly view, which shows the entire month (refer to Figure 4).
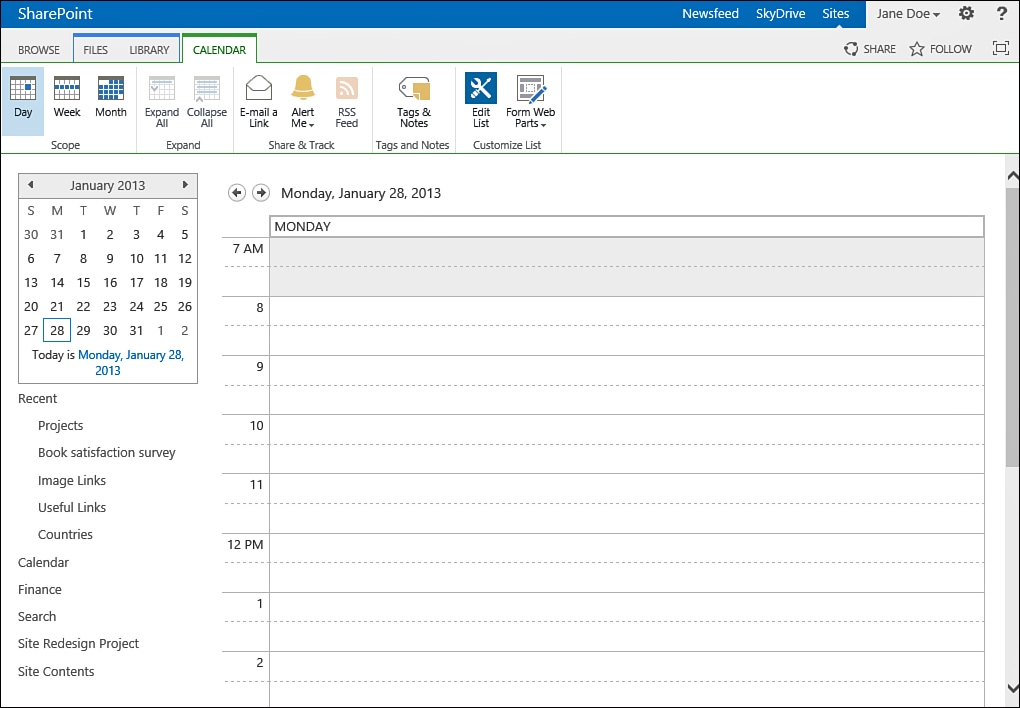
FIGURE 6 The daily view for a document library.
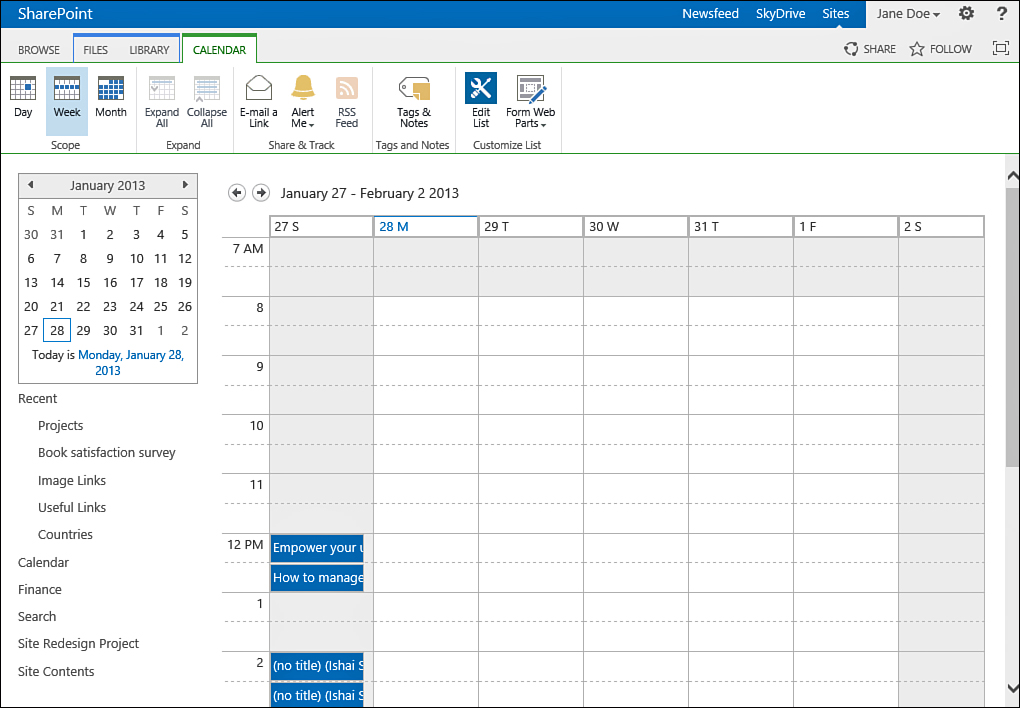
FIGURE 7 The weekly view for a document library.
These subviews are part of the view itself and are all configured as part of creating the calendar view.
Create a Gantt View
A Gantt view displays items based on date columns—much like the calendar view. However, it shows the items in a Gantt chart, where each item is displayed as if it were a task in a project plan. A tabular version of the view appears to the left of the chart, showing more details on the list items (see Figure 8).
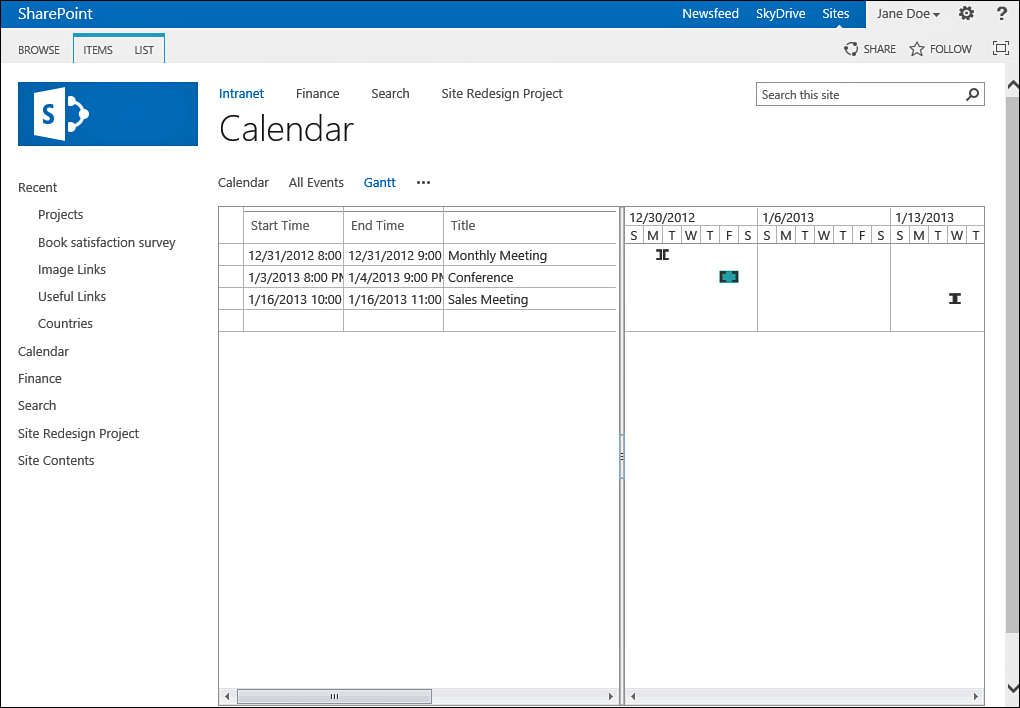
FIGURE 8 The Gantt view for an events list.
Creating a Gantt view is similar to creating a standard view. Select the Gantt view type in the view type selection page, and you get the same options as all views to name the view and select whether it should be the default view and whether it should be personal or public.
After configuring those options, scroll down to the Gantt Columns section of the page (see Figure 9). In this section, you configure what columns will be used as the title column, starting date column, and due date column. Optionally, you can also specify a percentage column to indicate in the Gantt chart how the item has progressed and the predecessors column. (A predecessors column is a column that specifies for each item which should be completed before it can start. This is most common with tasks that have to be done sequentially.)

FIGURE 9 Creating a Gantt view.
The column you select in the Title box is displayed in the Gantt chart as the title of the item. In most cases, this is the title column, but you can also display a different column as the title.
Note
The Percent Complete option shows only number columns. If you want such a column and the list doesn’t have one, you must create one for the list.
Create a Quick Edit View
Creating a view that opens automatically in Quick Edit mode is called a datasheet view. Creating such a view is exactly like creating a standard view. You select the datasheet view type in the view type selection page, and you get the same options to name the view and select whether it should be the default view and whether it should be personal or public. However, a datasheet view has fewer advanced options to choose from than standard views.