3. Managing Shares
Using the Windows SBS Console, you can view all the shared folders on your server, both the default shares and any new ones you have created. To view the shares, open the Shared Folders And Web Sites page, and then click the Shared folders tab, as shown in Figure 1. By selecting a share and using the controls in the Tasks list, you can stop sharing the folder or modify its properties, as described in the following sections.
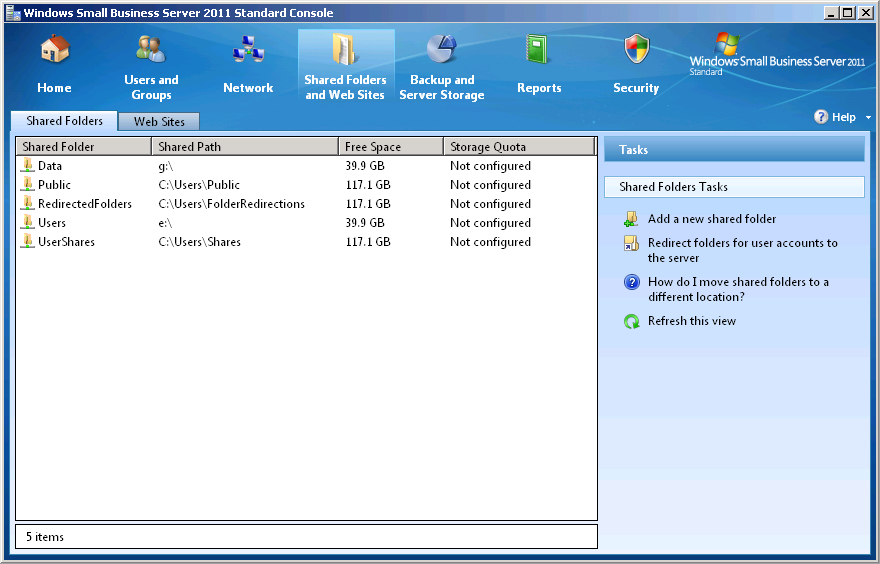
Figure 1. The Shared folders tab in the Windows SBS Console.
Configuring Share Permissions Using Windows SBS Console
To change a share’s permissions, you must first open its Properties sheet. Select the share and then select Change folder permissions from the Tasks list to open the share’s Properties sheet. Then select an entry in the Users and groups list to see the share permissions assigned to that entry. For example, Figure 2 shows that Everyone has the Allow read permission.
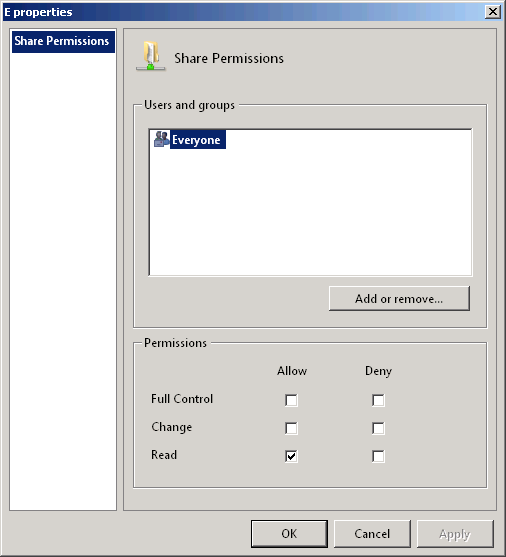
Figure 2. The Properties sheet for a shared folder in the Windows SBS Console.
For the default shares, Windows SBS 2011 grants the Allow full control permission to the Everyone special identity. Changing the permissions for the default shares is not recommended. The shares you create yourself receive the permissions that you specify in the Provision A Shared Folder Wizard. You can modify these permissions by selecting an entry in the Users and groups list and selecting the check boxes for the permissions you want to assign. To manage the entries in the list, click Add or remove to display the Shared Folders dialog box, as shown in Figure 3.
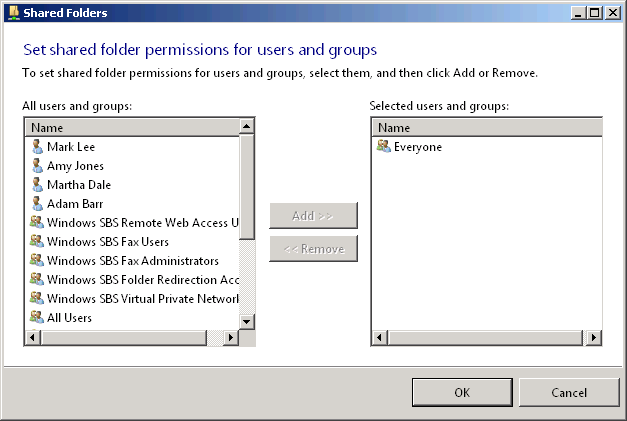
Figure 3. The Shared Folders dialog box in the Windows SBS Console.
Note
BEST PRACTICES Remember that in addition to share permissions, users must have the appropriate NTFS permissions to access a shared folder. To simplify the administration of your shares, the recommended practice is to always grant Everyone the Allow full control share permission and use NTFS permissions to control access to the shared folders.
Configuring Share Permissions Using Windows Explorer
Whether you create a folder share with the Windows SBS Console or with Windows Explorer, you can use either tool to modify its share permission assignments. To manage share permissions using the Windows Explorer interface, you open the Advanced Sharing dialog box and click the Permissions button, just as you did earlier when creating a share


