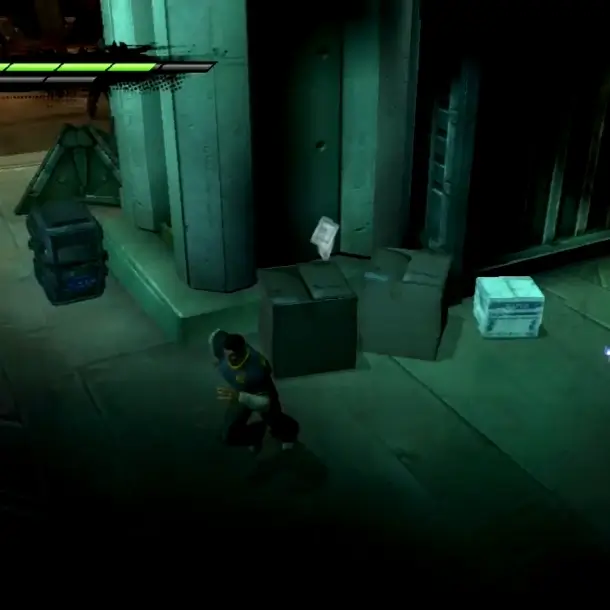
As you battle your way through X-Men: Destiny, keep an eye out for glowing triangular icons. These are Dossiers, packed with intel on every mutant and group you encounter. Here’s how to find all 24 and become a walking X-Men encyclopedia.
All 24 Dossier Locations in X-Men: Destiny
- Quicksilver: Remember that green health box near the building columns after meeting Quicksilver? Your first Dossier awaits right beside it.
- Emma Frost: After joining forces with Emma, follow her into the larger area. You’ll encounter enemies here – take them down quickly and snag the Dossier tucked away in the far right corner.
- Hodge Factions: Leaving the jail cells after your encounter with Emma? Don’t forget to check the left edge of the cliff at the sewer exit. The Hodge Factions Dossier is waiting for you there.
- Pyro: As you navigate the broken crane walkway, keep an eye out for the water tower in the building’s right corner. Pyro’s Dossier is perched on its ledge.
- Nightcrawler: After collecting Propaganda Poster #6 and dealing with some enemies, head to the tall structure and look for the Dossier resting on the top of the couch.
- Cyclops (Final Area): In the final battle where you fight alongside Cyclops (or other allies depending on your choices), remember to grab the last Dossier before the action heats up. It’s on top of the dumpster in the left building.
- Mystique: Found Propaganda Poster #9? Great! Now head to the train station lobby and check the ticket counter. Mystique’s Dossier is hiding there.
- Toad: Look for the checker table in the market near Propaganda #13. Toad’s Dossier is chilling right on top of it.
- Externals Faction: After finding Propaganda #14 in the alleyway, continue through the market area. You’ll find the Externals Faction Dossier on the street next to the construction blockade, near the fence.
- Gambit: Head into the nightclub after Gambit’s cutscene. Don’t miss the Dossier tucked away inside “The Rogue Hand” on the bar counter.
- Iceman: Head to the warehouse building with the X marker and make your way to the rooftop (after finding Propaganda Poster #17). Take a right, then a left, and climb the wooden stairs. Iceman’s Dossier is on the ground next to some barrels.
- U-Men Faction: After seeing Quicksilver again, open the door and fight off the enemies. Head to the third room, locate the support column, and look to the right side. You’ll find the U-Men Faction Dossier beside a cargo container.
- Surge: During the fight with the Purifier Stalker, look for the Dossier on a crate next to a cargo container.
- Colossus: Head to the control room’s far right corner. You’ll find the Dossier alongside a Propaganda Poster and an X-Gene.
- Luis Reyes: After Wolverine leaves you battling enemies, head to the platform and turn right. The Dossier rests in the middle of the first Sentinel manufacturing platform, near a blinking orange light.
- Wolverine: Right after finding Luis Reyes’ Dossier, check underneath the Sentinel manufacturing platform in the room’s right corner, near the X marker. The computer terminal there holds Wolverine’s Dossier.
- Caliban: Following the Purifier Stalker cutscene, locate the vent’s entrance. The Dossier sits on top of the computer terminal on the right side of the door.
- Northstar: After defeating the enemies with Caliban and exiting the cargo container yard, look for the Dossier near the fence, right next to barrels and a construction blockade.
- Juggernaut: Accepted Juggernaut’s challenge? Head down the street and look on the ledge of the building to the left of the doorway. There you’ll find Juggernaut’s Dossier.
- Pixie: After jumping over the cranes, you’ll break through the floor and fall down. Look to your right on the wall to find Pixie’s Dossier.
- MRD Faction: Right at the mission’s start, look in the rubble next to the scaffolding on your right. The MRD Faction Dossier awaits.
- Magneto: After defeating the mind-controlling speakers with Toad, take the stairs up. You’ll find Magneto’s Dossier near Propaganda Piece #31 by the bricked building.
- Forge: Locate Propaganda Pieces #33 and 34. Look for the Dossier on a barrel inside the garage on the left side of the street, near Propaganda Poster #35.
- Bastion: Congratulations! You’ve found all the Dossiers except the final one. Head to the mission’s end and climb the broadcast tower. On top of the computer terminal lies the Bastion Dossier, completing your collection.

With this guide, you’ll have all the intel you need to uncover the secrets of X-Men: Destiny‘s characters and factions. So, grab your controller and get ready to learn everything there is to know about this exciting world!
Related:


