Staring down that dreaded “Connected, no internet access” icon in Windows? Don’t panic! This guide will walk you through troubleshooting steps to get you back online.
Understanding the Problem
First, let’s decipher the situation. When you see “Connected, no internet access,” it means your computer is hooked up to your Wi-Fi network, but it can’t reach the wider internet. This differs from “Not connected, no internet,” which indicates your computer isn’t connected to the Wi-Fi at all.
How to Fix “Connected to Wi-Fi but No Internet Access” in Windows
1. Check Other Devices
Before diving in, check if other devices on your network (phones, tablets) also lack internet access. If they’re online, the problem likely lies with your PC’s settings. But if everyone’s offline, the issue might be with your router or internet service provider (ISP).
For all-device internet outage: Briefly disconnect the Ethernet cable from your modem and connect your PC directly to the modem using this cable. If the internet works now, the router might be faulty.
2. Restart Your PC
A simple computer restart can often resolve temporary network glitches. Give it a shot, and see if your internet connection revives.
3. Restart Router and Modem
Network troubles often originate from your modem and router. Here’s how to restart them properly:
- Power off the modem.
- Wait for it to fully boot up before plugging the router back in.
- Give them a few minutes to power on completely.
While they’re restarting, check for any abnormal light patterns on your modem or router. Missing lights or irregular blinking could indicate faulty hardware.
4. Disable VPN Connections
If you’re using a Virtual Private Network (VPN) app, software connection, or a VPN setting on your router, turn it off and try connecting again. If the internet starts working, the VPN might be causing the conflict. Consider keeping the VPN off during troubleshooting to isolate the issue.
5. Run Windows Network Troubleshooter
Windows comes with a built-in troubleshooter that can diagnose and potentially fix network issues. While it might not always be the ultimate solution, it’s worth a try:
- Windows 10: Go to Settings > Network & Internet > Status. Select “Network troubleshooter” and follow the steps.
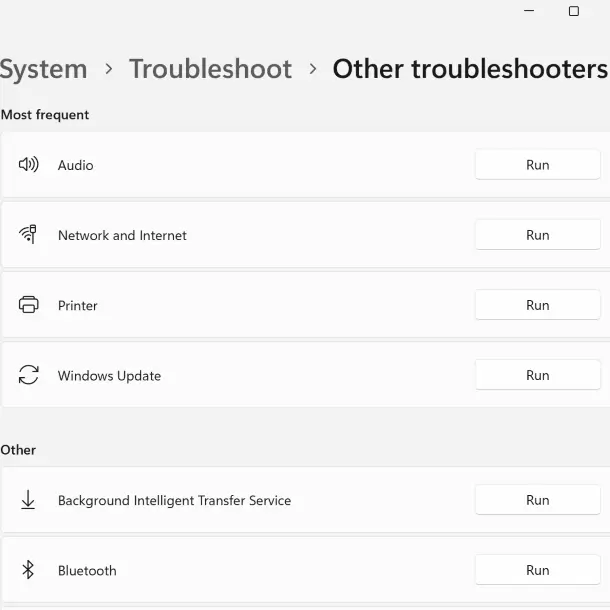
- Windows 11: Navigate to Settings > System > Troubleshoot > Other troubleshooters > Network and Internet.
6. Verify IP Address Settings (For Single Device Issue)
An incorrect IP address can prevent internet access. Here’s how to check and fix it:
- Windows 10: Go to Settings > Network & Internet > Status. Click “Change adapter options” and double-click your active connection. Open “Properties” and double-click “Internet Protocol Version 4.” Ensure “Obtain an IP address automatically” and “Obtain DNS server address automatically” are selected. Click “OK” and try accessing the internet again.
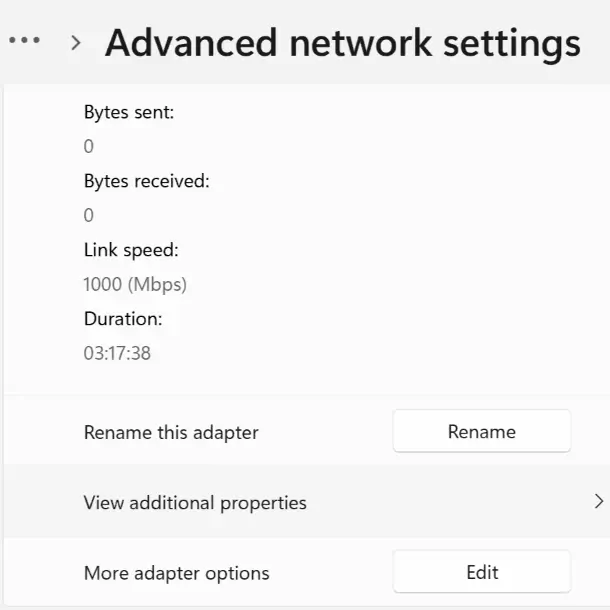
- Windows 11: Go to Settings > Network & internet > Advanced network settings. Select your connection and then “View additional properties.” Under “IP assignment” and “DNS server assignment,” choose “Automatic (DHCP)” and confirm the changes.
7. Check ISP Status
It’s uncommon, but internet service providers (ISPs) can experience outages. Use your phone’s data to check your ISP’s website or a service like DownDetector to see if outages are reported in your area.
8. Command Prompt Tools (Advanced)
If the above steps fail and the issue is specific to your device, we can try some commands in Command Prompt to reset network settings and configurations. (Skip this step if multiple devices have no internet.)
- Open Command Prompt as administrator (right-click “Command Prompt” in the Start menu and select “Run as administrator”).
- Run the following commands one by one, pressing Enter after each:
netsh winsock resetnetsh int ip resetipconfig /release(releases your current IP)ipconfig /renew(obtains a new IP from the router)ipconfig /flushdns(clears DNS cache)
- After trying these steps, restart your computer and see if your internet connection is restored.
9. Reset the Network (For Your Computer)
If you’re still struggling, resetting your network settings on Windows might be the solution. (Skip this step if multiple devices have no internet.)
- Windows 10: Go to Settings > Network & Internet > Status. Click “Network reset” at the bottom of the screen, then select “Reset now.”
- Windows 11: Go to Settings > Network & internet, then click “Advanced network settings” and select “Network reset.”
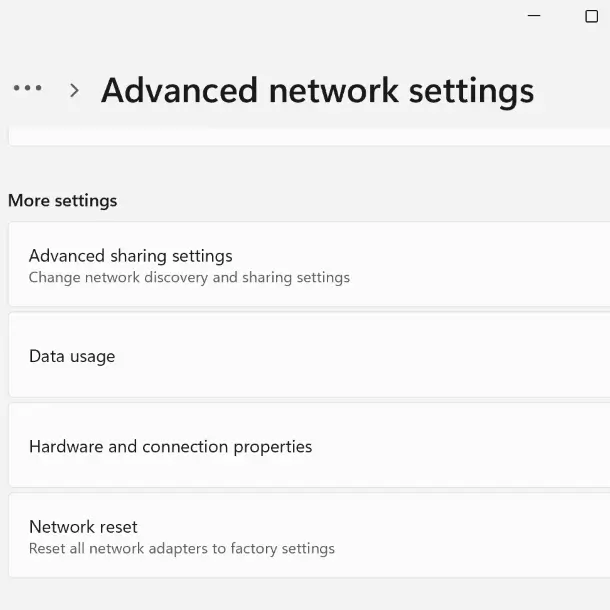
Note: This will remove all network adapters and reset all network settings to default. You’ll need to reconfigure everything, including VPNs.
10. Reset the Router (For Your Entire Network)
If no devices on your network have internet access, it’s time to reset your router (and modem, if needed). Locate a small pinhole on the back of your router. Press and hold it with a paperclip for a few seconds to reset it to factory defaults. Caution: This will erase all custom network settings on your router.
If there’s no reset button, log in to your router’s interface and perform a factory reset from there.
By following these steps, you should be able to diagnose and fix the “connected to Wi-Fi but no internet access” error on your Windows computer. If none of these solutions work, consider seeking help from advanced troubleshooting guides or contacting your ISP for further assistance.
Related:


