David Hayward has a look at setting up a virtual machine that runs DOS, along with some classic games and apps
Hands up all those who still have their old DOS system boot disks, gathering dust at the bottom of a draw somewhere? Yep, me too. I think I have a DOS boot disk for every possible eventuality, containing network drivers, pushing programs into high memory areas, loading up the SoundBlaster settings and booting with over 600KB of base memory free, in case I had to have a slick system for a game to run on.
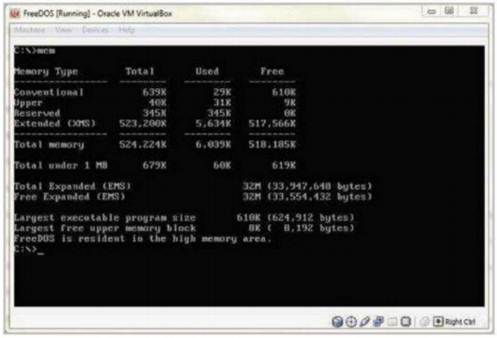
Look, I’ve got 610KB free!
DOS was pretty cool, and although it might be lost in the sands of time, it’s certainly not buried beyond all thought. That being case, we thought an article on installing DOS inside something like VirtualBox would be a bit of fun, and allow us to have a nostalgic stroll down memory lane by playing around with some of the old DOS-based games and applications we used to love so much.
FreeDOS
Unfortunately, Microsoft hasn’t quite got around to making DOS 6.22 available as freeware, which is a bit of a shame really. However, we do have an alternative we can use: FreeDOS. FreeDOS is a project that’s been around for quite some time now, launched with version 1.0 in 2006. It will allow most modern but mainly older PCs to run an equivalent open-source version of the old-style MS-DOS.
Anyway, your first port of call to have a play with FreeDOS will be VirtualBox, or some other virtual machine application, unless of course you plan to run FreeDOS on an individual machine. Oracle’s VirtualBox can be found at bit.ly/Lj4qvB. Locate the version specific to you, then download and install it.
Once you have VirtualBox up and running, navigate over to the FreeDOS site and get hold of the latest base version, which at the time of writing is version 1.1 (bit.ly/KfsVdG). The .iso is only roughly 40MB, so it shouldn’t take too long to download (obviously, depending on the speed of your connection).
Now that you have all the ingredients, let’s quickly run through the installation via VirtualBox – if you’re not using VirtualBox then you can skip this bit.
Installing FreeDOS
First, click on ‘New’ within VirtualBox, and follow the setup wizard. Name the new VM ‘FreeDOS’, and you should see that VirtualBox will automatically alter the OS and version to ‘Other’ and ‘DOS’. Next, change the memory to something like 512MB, which is plenty for DOS- based programs. Now create a new hard disk, sticking with the default VDI in this particular case, for no other reason than it’s just easier. Make it Dynamically Allocated and set it for around 500MB. These settings are dependent on what your own system can spare; they’re not set in stone. When you’re ready, click on the ‘Create’ button, and you should now have a FreeDOS VM sitting in VirtualBox ready for action.
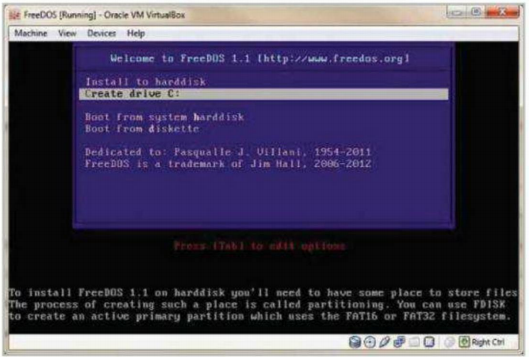
Fig. 1: Follow the instructions on screen and you shouldn’t go wrong
Okay, if you’re ready, click on Start and point the Installation Media to the FreeDOS .iso you’ve just downloaded. When the boot loader appears, use the arrow keys, and select ‘Create drive C:’ from the menu – see Fig. 1. Choose ‘Y’ to use large disk FAT32 support (Fig. 2), and press Enter. The screen you’re now looking at will no doubt bring back some memories: the classic Fdisk.
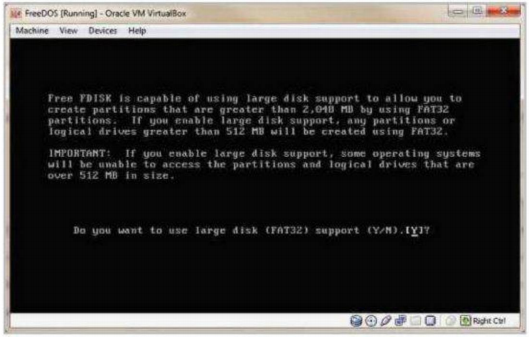
Fig. 2: Fdisk – remember this? Remember having to read everything twice?
If you’ve forgotten how to use this or it’s your first time, start by pressing number 1 to create a new DOS partition (Fig. 3), and hit Enter. Next, choose number 1 again to create a primary DOS partition, Fig. 4, and select ‘Y’ to use the maximum available size. When all that’s done (it shouldn’t be too long with VirtualBox), press Esc a couple of times to exit Fdisk and reboot the VM.
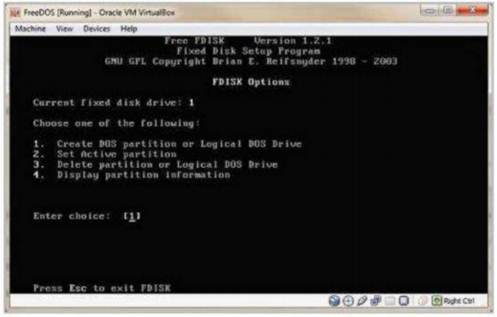
Fig. 3: Especially during this bit…
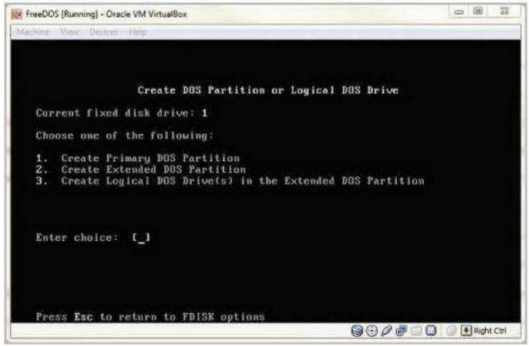
Fig. 4: And this bit…
When the system has rebooted, choose ‘Install to hard disk’ from the main menu, followed by the number 1 to install to the newly created partition. The next screen asks for the language setup; in our case it’s English US – see Fig. 5. For the next option, you’re asked to format the new partition as FAT32. Obviously you’ll need to do this, so just go ahead and select ‘Yes’ (Fig. 6), followed by typing ‘YES’ to confirm the format.
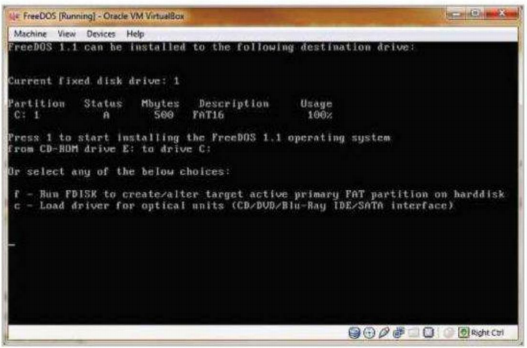
Fig. 5: Once you’ve created the partition, FreeDOS makes it easy to install
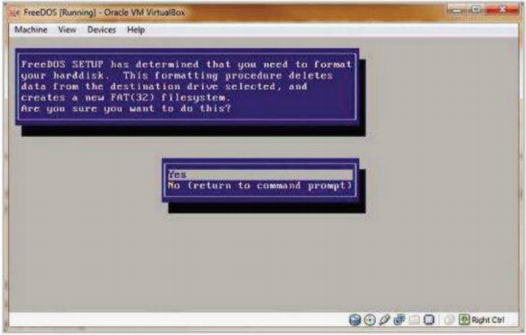
Fig. 6: Not that you have a lot of choice in the matter
Now continue with the FreeDOS installation, choosing the first option from the menu (see fig Fig. 7), then number 1 again to confirm. When you’ve agreed with the various licences, press Enter a couple of times and go with the default settings for the installation location – see Fig. 8. In this next screen, we decided to select all the extras by moving the arrow key right and hitting space to highlight the packages; you don’t have to, but it may help with any issues you have later on – see Fig. 9.
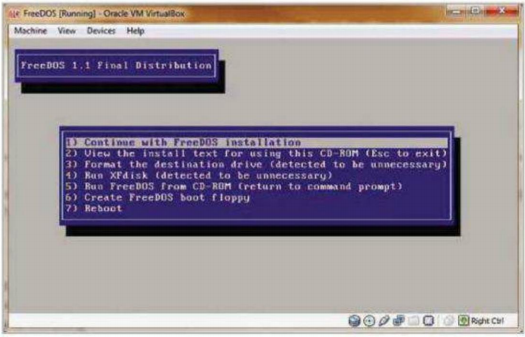
Fig. 7: You’ll soon get used to seeing these menus

Fig. 8: Look, there’s another one!
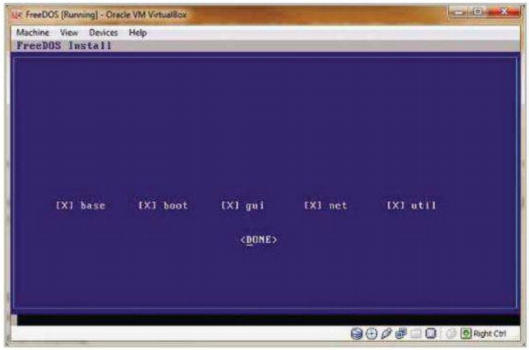
Fig. 9: Just how many menus has this thing got anyway?
Scroll down and click ‘Done’ again, then wait for the FreeDOS files to be installed into their relevant locations. After several more ‘press any key to continue’ screens and another ‘Done’, just for good measure, you’ll be left with the screen as seen in Fig. 10. To avoid any confusion, we simply selected option 1 to allow FreeDOS to be bootable and easy to configure.
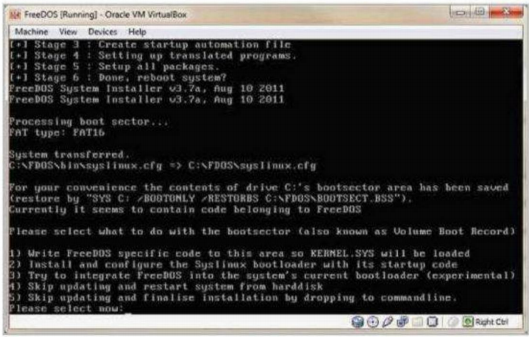
Fig. 10: Errmm, option number 1?
When the VM reboots, you can choose ‘Boot from system hard disk’ from the menu and you’ll end up with yet another menu to select from. This one gives you several options to load up the memory managers and any available drivers. To be honest, it’s up to you which option you choose, but to stay with this article we decided to choose option 2, which is Load FreeDOS with EMM386 (Expanded Memory) and SHARE loaded.
So here we are, all DOS’d up and ready for action. Now what? Let’s start by heading to DOS Games at bit.ly/MtSNia. Here you’ll find a wide selection of games that will run under DOS-based operating systems; in this particular case, we’ve decided to pick Doom from the list. Clicking the link for Doom downloads a zipped file containing the relevant executables, but there’s no way to transfer them over to the FreeDOS VM. To make things easy, we unzipped the contents into a folder, Imaginatively entitled ‘Doom’, and converted the folder Into an .iso using ISO Recorder (bit.ly/KfHqle). By right-clicking on the folder and selecting ‘Create ISO Image File’ then labelling the new .iso volume as ‘Doom’ and selecting ‘CD’, we can now launch the folder as if it was a normal CD within FreeDOS VM.
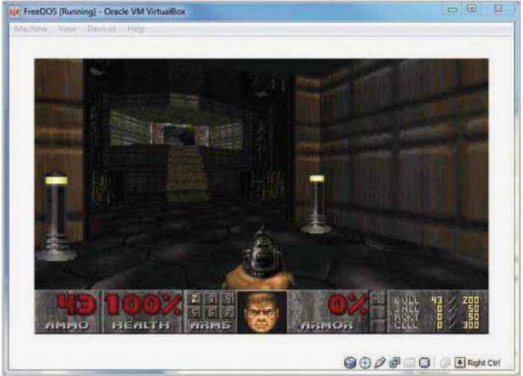
Ahh Doom. Now this is more like it!
With the created .iso on your host’s hard drive, select ‘Devices’ from the menu along the top of VirtualBox VM window. Then click on ‘Choose a Virtual CD/DVD disk file’ from the submenu and point it to your newly created .iso. Once that’s done, wait for a few seconds and type Into FreeDOS ‘D:’ to change drives to the virtual CD/DVD drive. With luck, you should be able to type in ‘dir’, and see the contents of the .iso. After that you just need to, usually, type in something like lnstall.bat.
Amazingly, Doom installed perfectly. We left the defaults selected, Including the sound, which was SoundBlaster (IRQ 220 and so on) and we enjoyed getting shot to pieces all over again. So now we know how to get a DOS program to work, what other titles are there for us to play with? As well as Doom, here are a couple of other games we thought were worthy of some attention.
Duke Nukem 2
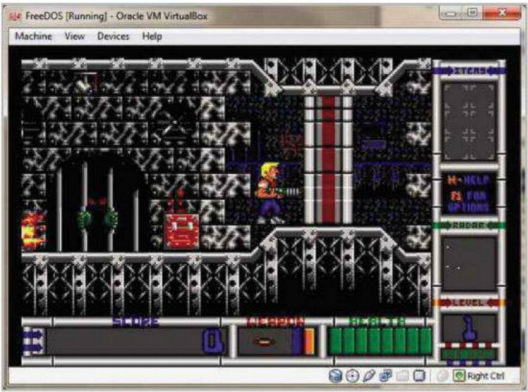
Duke Nukem 2. Classic DOS gaming
Somewhere in between classic Duke and the unforgettable Duke 3D, there came Duke Nukem 2. Although it didn’t do quite as well as the other Duke titles, it’s still a favourite. To get it working, do the same as Doom: download, unzip Into a folder called ‘Duke’ (or whatever) convert the folder to an .¡so via .ISO Recorder, load up the .iso into VirtualBox and run lnstall.bat from within FreeDOS. It works okay, but the sound was a little choppy, then it failed altogether, but we made up our own sound effects after that.
Galactix
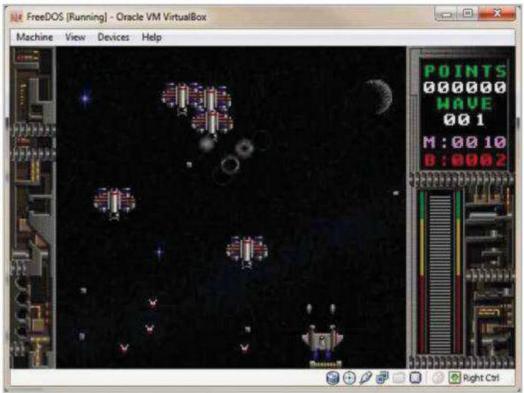
DOS was designed purely for space shooters (that may not be true)
2D top-down space shooters were all the rage at one time, and Galactix was one of the more top-notch versions available. Point your collective browsers to bit.ly/LtZGBT to download the zipped file. Do the same as the above games, but this time make sure you have at least 600KB of conventional memory available before trying to play it.
DOS Apps
With the internet at our fingertips, it’s easy to get hold of virtually every DOS game ever conceived. Although licensing and copyright may inevitably get in the way, there’s also the chance to get hold of some of those really cool DOS programs or applications that we used to tap away at in the wee hours.
Breeze Word Processor
Breeze word processor was developed way back in 1993 and is still available today from bit.ly/KYDeU7. It’s a pretty good word processor and contains most of the useful tools we expect to see in a modern word processing application. All you need to do to get it working is download the zip file from the site, unzip it into a folder and convert the folder to an .iso, then load the .iso up into FreeDOS via the Devices menu in VirtualBox. When the .iso is ready, create a folder on FreeDOS called Breeze by typing ‘md Breeze’.
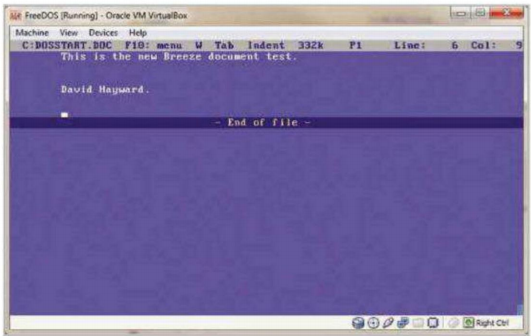
Breeze, the DOS word processor
Next, change into the Breeze folder with ‘cd Breeze’. Your prompt should now be c:\Breeze. If it is, then type in ‘xcopy d:\*.* ‘ to copy the contents of the .iso into the Breeze folder. All that’s needed now is to type in ‘Breeze’ to run the program.
QuickView
Developed in 1998, the original QuickView, version 1.03b (real mode) is a superb media player for DOS-based systems. You can find the relevant downloads from the QuickView site at bit.ly/LUIgP7. We used the 1,03b version in our testing with FreeDOS and it worked perfectly, albeit a little slow in comparison to a modern media player, obviously. Do the same as with Breeze to get QuickView running, but you may want to consider including an AVI in the folder before making it into an .iso. Be warned, though, by default FreeDOS will only look at CDs, so you’ll have to play around a little to get a DVD working. Once you have the QuickView files copied over, simply launch the program by typing in ‘QV’, then follow the on-screen help (at the bottom of the screen) to navigate to the selected location of the movie or image files you want to view.
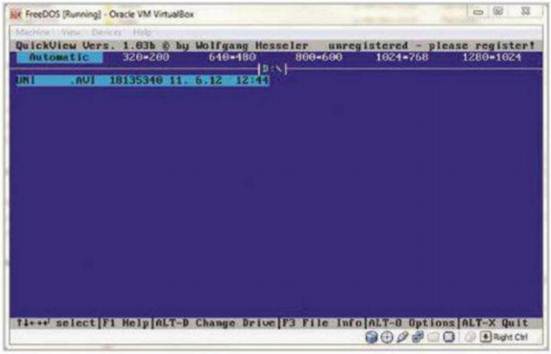
A media player for DOS, although the media played pretty poorly
A world of DOS
There are tons of DOS dedicated sites, and we’ve put some together in the boxout, so have a look around and see what you can get running with FreeDOS. More importantly, have fun reliving your computing days with DOS.
DOS sites worth visiting
Here are a few of our favourite DOS related sites:
Vernon Frazee
DOS 6.22 command line reference: bit.ly/ LkxWks
Abandonware DOS
Great DOS games, all abandoned: bit. ly/LQe983
Free Classic DOS games
A site with some free classic DOS games, oddly enough: bit.ly/LNeWZq.
DOS Archive
A home for legacy DOS software: bit.ly/MBFRtS.
Apogee Software Archive
Full of Apogee DOS games: bit.ly/LUs3lp
