The cryptic WHEA Uncorrectable Error (WUE) can leave you scratching your head, but fear not! This guide will equip you with the knowledge to tackle this hardware-related issue in Windows.
What’s the WHEA Uncorrectable Error in Windows?
The WUE, identified by the stop code 0x0000124, signifies a hardware malfunction within your system. While the exact cause can vary, several common culprits often trigger this error:
- Faulty Hardware: Damaged components like hard drives, SSDs, GPUs, CPUs, power supply units (PSUs), or faulty RAM can cause the WUE.
- Driver Issues: Incompatibility or outdated drivers can sometimes disrupt smooth system operation, leading to the WUE.
- Overheating: Overclocking or inadequate cooling can cause your system to overheat, triggering the WUE.
- Corrupted System Files: While less common, corrupted Windows system files or registry entries can also contribute to the WUE.
How to Fix
While a specific solution isn’t guaranteed for every case, these steps can help you diagnose and potentially fix the WUE:
Run CHKDSK
- Open Command Prompt as administrator (search for “Command Prompt” in the Start menu, right-click the best match, and select “Run as administrator”).
- Type
chkdsk /rand press Enter. This command scans and fixes errors on your system drive.
Update Drivers
While less common nowadays, outdated or incompatible drivers can cause problems. Check Windows Update for recent driver updates, especially for hardware like graphics cards. Here’s how to access the update history and Device Manager on different Windows versions:
On Windows 10:
- Check for driver updates in Settings > Update & Security > View update history.

- Open Device Manager (search for “Device Manager” in the Start menu) and look for any devices with yellow exclamation marks, indicating potential driver issues.
On Windows 11:
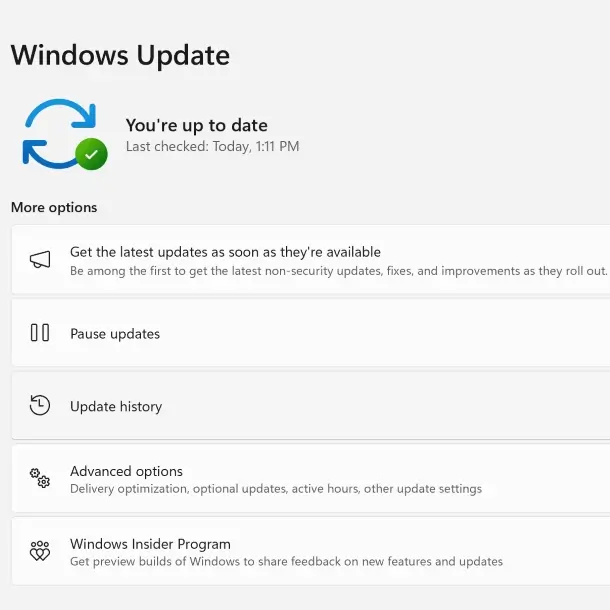
- Check for driver updates in Settings > Windows Update > Update history.
- Open Device Manager (search for “Device Manager” in the Start menu) and look for any devices with yellow exclamation marks.
Check Your Hardware
Ensure proper ventilation and securely seated components. If unsure about hardware maintenance, consult a professional or instructional videos. Consider removing recently installed hardware as it may disrupt your system.
Diagnose RAM Issues with MemTest86
While the CHKDSK command can identify some issues, MemTest86 offers a more comprehensive memory test specifically designed to detect RAM errors.
- Visit the official website (https://www.memtest86.com/help.html) and download the free version.
- Right-click the downloaded archive and use a tool like 7-Zip or PeaZip to extract the contents. Windows 11 users can use the built-in extraction tool by right-clicking and selecting “Extract Here.”
- Download and use an ISO to USB tool to write the MemTest86 image file onto a blank USB flash drive.
- Restart your system and press the key to access the boot menu (usually F10, F11, DEL, or ESC). Select the bootable USB drive from the list.
- MemTest86 will automatically begin testing your RAM. This can take several hours, so be patient.
- If any errors are detected, note down the specific error code and type. Use a search engine to find solutions specific to your error code.
Undo Overclocking (if applicable)
Overclocking your CPU or RAM can push them beyond their intended limits, potentially leading to instability and the WUE. If you’ve overclocked your system, try resetting it to its default settings:
- Restart your computer and press the designated key (F1, F2, F10, DEL, or ESC) to access the BIOS/UEFI menu during boot.
- Locate the “Overclocking” section (usually under Advanced, Performance, Frequency, or Voltage). Menu names may vary depending on your manufacturer.
- Look for options like “Reset to Default” or “Load Optimized Defaults.” Select this option and save your changes before exiting the BIOS/UEFI menu.
Update Your BIOS/UEFI (Proceed with Caution)
Outdated BIOS/UEFI firmware can lead to compatibility issues and contribute to the WUE. Updating your BIOS/UEFI might resolve the error, but exercise caution, as a faulty update can render your system inoperable. Follow these steps only if you’re comfortable with the process:
- Download and run CPU-Z. Under the “Mainboard” tab, find your motherboard manufacturer and model.
- Use the information from CPU-Z to search the internet for “
[your motherboard manufacturer + model] bios update.” - Download the update and any accompanying instructions from your motherboard manufacturer’s official website.
- Follow the manufacturer’s instructions precisely to avoid complications.
Reinstall Windows (Last Resort)
If all else fails, consider resetting Windows to refresh your system:
- Windows 10: Go to Settings > Update & Security > Recovery, then select “Get started” under “Reset this PC.”
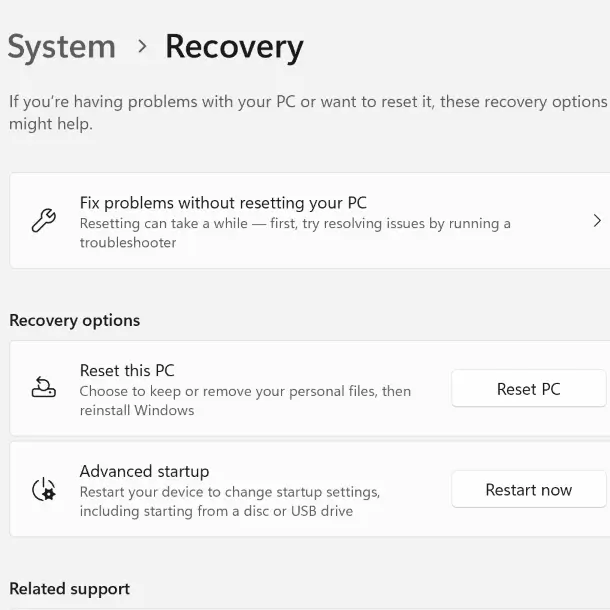
- Windows 11: Navigate to Settings > System > Recovery, then select “Reset PC.”

Important Note: This option completely erases your installed programs and settings. Back up important data before proceeding. Choose “Keep my files” to preserve personal files while removing apps and settings, or select “Remove everything” for a complete wipe.
While these advanced solutions can address the WUE, remember that hardware modifications like overclocking can increase the risk of future errors. Proceed with caution and consult a professional if you’re unsure about any steps. By combining these advanced approaches with previous advice, you can significantly increase your chances of conquering the WUE and regaining a stable Windows system.
Related:


