1. Introducing the Expression Builder
When you set a validation rule to check field data or when you create a calculation to find the total value of an order, you create an expression to evaluate the contents of one or more table fields. Rather than make you memorize how to identify the fields you want to use or which operators are available, you can use the controls in the Expression Builder to create your expressions quickly.

2. Formatting Field Contents
Access 2010 lets you choose how to display the contents of data in your tables. For example, you can display the field’s contents in all upper- or lowercase letters, change the color of the text, or display characters in addition to the data entered into the field. For example, if a product is only available by the case, adding the word “cases” after the number would remove any confusion as to the quantity being ordered. Adding formatting instructions only changes how data is displayed—it doesn’t affect the data itself.
Change Field Format
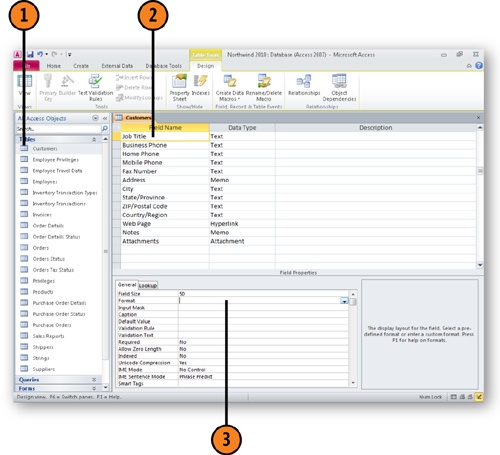
- Open a table in Design view.
- Click the name of the field to format.
- Type the formatting instructions in the Format property box.

Tip
A down arrow appears in the Format property box when the box is active; clicking the down arrow displays a list of recently used formats. To reuse a format, simply click it.
| Character | Resulting Format |
|---|---|
| ! | Left align. |
| < | Lowercase. |
| > | Uppercase. |
| & | Instruction to follow. |
| “Text” | Display the text as it appears between the quotes. &” kg” displays the value “16” as “16 kg.” |
| (space) | Insert a blank space. |
| \ | Display the next character as entered. &\m displays the text “100” as “100m.” |
| @ | Require a character; @@@-@@@@ displays the text “5550011” as “555-0101.” |
| * | Fill all blank spaces in the field with the named character. In a field with a maximum character property of eight, &*# displays “five” as “five####.” |
| [color] | Display the field’s contents in one of the eight available named colors (black, blue, green, cyan, red, magenta, yellow, and white). |
3. Creating Input Masks
Databases are only as good as the data they hold, so it’s important that you and your colleagues enter data correctly. You can guide data entry in text and date fields by creating an input mask, which gives you a template to follow when entering data in a field. For example, if your company’s product codes follow a particular pattern, you can establish that pattern by using an input mask, ensuring that you and your colleagues enter the right sort of data into the field.
Define an Input Mask
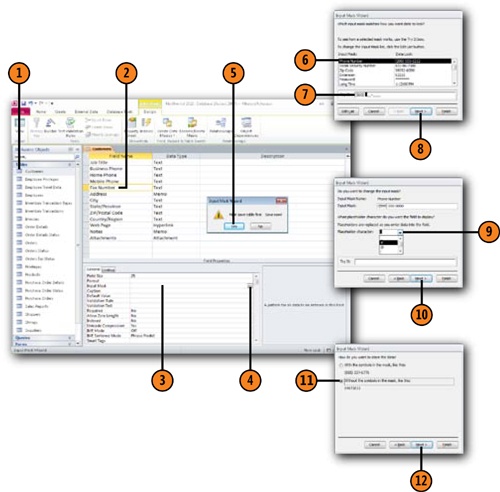
- Open a table in Design view.
- Click the field for which you want to create the input mask.
- Click in the Input Mask property box.
- Click the Build button.
- Click Yes to save the table.
- Click the desired input mask.
- Type values in the Try It box to ensure that the input mask works as expected.
- Click Next.
- To choose a new placeholder character, click the Placeholder down arrow and then click the new character.
- Click Next.
- Select the option indicating whether you want to store the data as entered or with the characters in the input mask.
- Click Finish.

Tip
Assign the Text data type to fields holding phone numbers so that you can take advantage of the Phone Number input mask.
Tip
If the data entered into a field is sensitive and shouldn’t be read by someone watching as you or your colleague enters the data, choose the Password input mask.
Edit an Input Mask
- Click the field to which you assigned an input mask.
- Click in the Input Mask property box.
- Change the input mask using the available symbols.
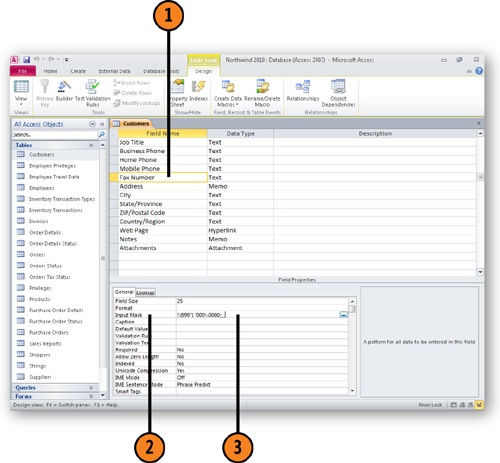

| Symbol | Description |
|---|---|
| 0 | Required digit (0 to 9) |
| 9 | Optional digit (0 to 9) |
| # | Any digit or space |
| L | Required letter |
| ? | Optional letter |
| > | Makes following characters uppercase |
| < | Makes following characters lowercase |
| A | Required alphanumeric character |
| a | Optional alphanumeric character |
| & | Requires any character or space |
| C | Optional character or space |
Tip
You can also reopen the Input Mask Wizard by clicking the Build button at the right edge of the Input Mask property box.