Chapter 14 of Final Fantasy 7 Rebirth throws you into an epic showdown against Sephiroth, your ultimate nemesis. This guide equips you with the knowledge and strategies to overcome this grueling, multi-stage boss fight.
How to Defeat Sephiroth in Final Fantasy 7 Rebirth Chapter 14
Preparation
This is no ordinary brawl; it’s a marathon that demands your entire party to be in top form. Here’s how to ensure victory:
- Aim for at least Level 50 for all characters. Level 70 is ideal, achievable through combat challenges or arenas.
- Cloud and Aerith need Healing, Barrier, and any materia that bolsters their survival. Consider Raise and Time Materia (for Haste on Cloud). Magnify Materia paired with Healing, Barrier, or Time is fantastic.
- Craft Giga-Potions, Mist Giga-Potions, and as many Mist Mega-Potions as possible. Hi-Ethers are crucial for MP recovery. Thankfully, your party recovers MP between phases.
- Equip Tifa, Barret, Red XIII, Yuffie, and Cait Sith with Healing and Elemental Magic Materia. Yuffie’s Elemental Ninjutsu shines in this fight. Red XIII’s Watcher’s Respite is a lifesaver.
- Since the party composition shuffles, ensure your secondary team (Tifa, Barret, Red XIII, Yuffie, and Cait Sith) is well-rounded and prepared for anything.
- Running low on crafting ingredients? Visit the Nibel Region Chocobo Ranch. They stock almost everything (albeit expensively), but you won’t need much Gil after this fight.
Jenova Lifeclinger
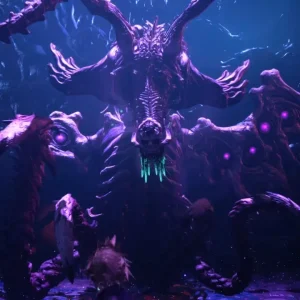
Phase 1
Jenova starts protected by a barrier that nullifies physical attacks. Your key to success lies in exploiting elemental weaknesses. Focus on using Lightning and Fire Materia to chip away at the barrier and inflict damage. Don’t forget to utilize Stagger-inducing attacks like Focus Thrust or Focused Round to create an opening for a critical strike.
As the fight progresses, Jenova will capture Barret and then Yuffie, temporarily removing them from the battlefield. Save your precious Limit Breaks for the upcoming phases, where they’ll prove more effective. Bring Jenova’s health down to 80% to trigger the next phase.
Phase 2
Jenova unleashes its full might in this phase. Barret and Yuffie rejoin the fight alongside Cloud. Interrupt Jenova’s devastating attacks, like Dreams of Sorcery, by hitting it with Fire or Lightning Materia. This phase presents a perfect opportunity to unleash your charged Limit Breaks (Level 2 or 3) to expedite the process.
At around 40% health, Jenova will unleash a devastating attack, shattering the arena and prompting a character switch. Here, Tifa and Cait Sith take center stage. Utilize Tifa’s powerful Unbridled Strength ability and Cait Sith’s Moogle Knuckle to demolish Jenova’s right wing. Remember, target the wing, not the main body!
The baton is then passed to Barret and Red XIII. Their objective is to destroy the left wing. This is where unleashing your stockpiled Limit Breaks or powerful Synergy Abilities can significantly shorten the fight. Prioritize dodging Jenova’s attacks while keeping your party healed. Once the wing is destroyed, Cloud and Yuffie return to finish the job by eliminating the remaining head.
Phase 3
The final phase throws you into a party with Cloud, Red XIII, and Cait Sith. Here, magic becomes your primary weapon, as physical attacks prove useless. Prepare for an MP-intensive fight, as only magic can damage or pressure Jenova.
Jenova’s Desecration attack demands a defensive response. Guard to mitigate incoming blows and prioritize keeping your party’s health topped up. Seize any opportunity to pressure Jenova with a magic attack, and one final magical strike will secure your victory.
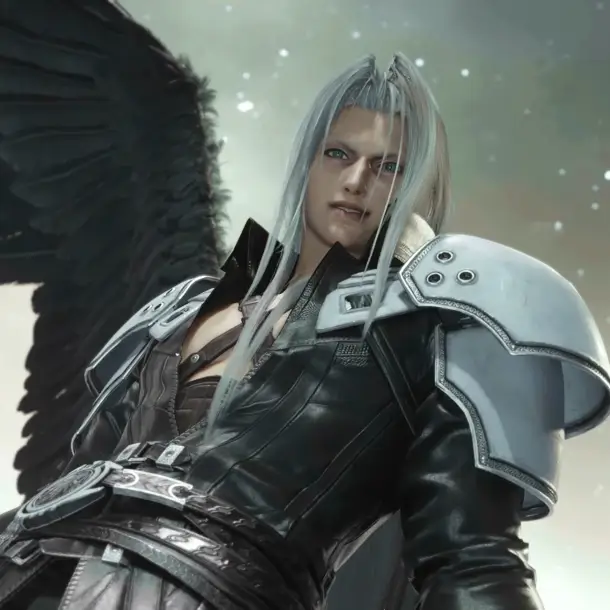
Boss: Sephiroth
The fight opens with a surprise! You take on Sephiroth alongside the powerful Zack Fair. Let Zack take the reins in this initial phase. His moveset packs a punch, making this fight a great opportunity to learn his combat style.
The key to maximizing Zack’s effectiveness lies in his charged abilities. Tapping the Triangle button rapidly amps up their power. To optimize your strategy, pay attention to Sephiroth’s focus. When he directs his gaze towards Cloud, unleash a charged Zack ability. However, be mindful of Sephiroth’s counterattacks – evade or guard before unleashing a charged attack, as he can easily interrupt you.
When Sephiroth readies his devastating Octoslash, go on the offensive. Hit him with Focused Thrust or any Level 2 charged attack from Zack’s arsenal. This aggressive approach will stagger him, creating a vulnerability window. Seize this opportunity to unleash your and Zack’s unique Synergy Ability to take down Sephiroth’s first form.
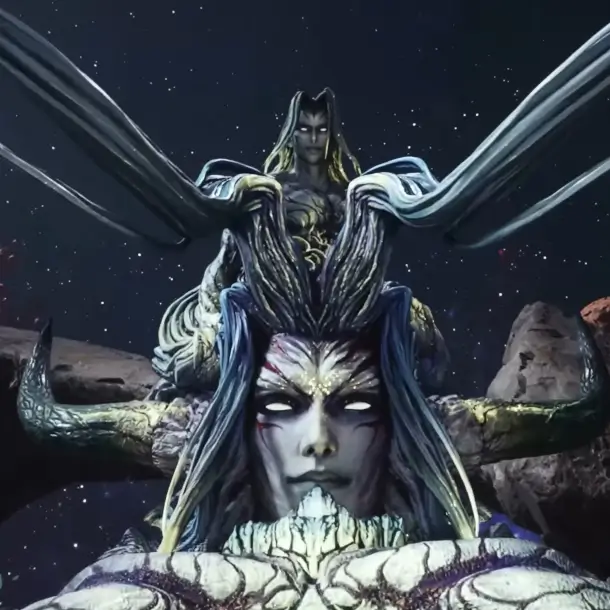
Boss: Sephiroth Reborn
Phase 1
The battle begins with a solo Cloud facing the massive fiend’s lower body. Focus your attacks here, particularly Focused Thrust and Disorder, to cripple it. Successfully landing Disorder grants you a valuable ATB refresh, allowing you to unleash another ability quickly. Be agile and dodge the debris the fiend spawns to avoid damage.
Once the lower body falls, Cloud grapples onto the upper section – the second head. Here, defense is key. Guard or dodge Swarm attacks and retreat when Sephiroth unleashes Apocalyptic Fire. This fiery onslaught is the perfect opportunity to heal your party. Recognizing Sephiroth’s patterns like Hell’s Gate (a devastating spear strike) and Inferred Horror (explosive blasts) is crucial. Dodge Hell’s Gate when the circle reaches its peak, and use spells to strategically counter Inferred Horror. Focused Thrust shines in this phase, building the Stagger meter effectively.
Phase 2
As Sephiroth’s health dips below 90%, the battle shifts. Barret, Tifa, and Cait Sith join the fray, but first, they must eliminate Bahamut Arisen Whisper. Leverage Synergy Abilities to exploit its weaknesses, similar to how you would handle a typical Bahamut summon. When Bahamut readies Gigaflare, prepare to deal significant damage before it unleashes this powerful attack.
The key to defeating Bahamut lies in destroying its wings one at a time. Focus your Limit Breaks and Synergy Abilities to inflict maximum damage. Remember, the wings will revive Bahamut, so be ready for a second round. During this phase, Sephiroth will slam its wings on the arena floor. Take advantage of this opportunity to attack and destroy them faster. Eliminate both wings and Bahamut to progress.
Phase 3
This phase welcomes Zack to the fight, but you’ll control him solo against a powered-up Sephiroth. His attacks remain largely unchanged from Phase 1, with one key addition – a magical ward in the arena’s center. Stand within this ward to energize an orb. Hurl this charged orb at Sephiroth to cripple and pressure him.
Your primary objective is to fill Zack’s meter for high-damage attacks. Utilize High Braver when Sephiroth is vulnerable, and don’t forget the unique Synergy Ability with Cloud (even though he’s not physically present).
Phase 4
Reuniting with Tifa, Yuffie, and Red XIII, your mission becomes clear: destroy the Core. This objective requires eliminating the Left and Right Wings first. Remember the four elemental affinities (Fire, Ice, Lightning, Wind)? To effectively damage these wings, use opposing elemental magic. For instance, unleash powerful Fire against Ice wings, and vice versa. Since the wings are often out of reach, magic becomes your primary weapon.
With both wings vanquished, the barrier protecting the Core crumbles. Tifa excels at destroying the Core with her Chi Trap and Unfettered Fury abilities. Once the Core falls, Sephiroth descends, employing attacks similar to the Cloud/Zack phases. Tifa’s strength in building Stagger proves invaluable in this stage.
Brace yourselves for Heartless Angel, an unblockable attack that reduces your entire party to 1 HP. Swiftly heal your team after enduring this devastating blow. Eliminate Sephiroth Reborn to enter the final, most challenging portion of this epic battle.
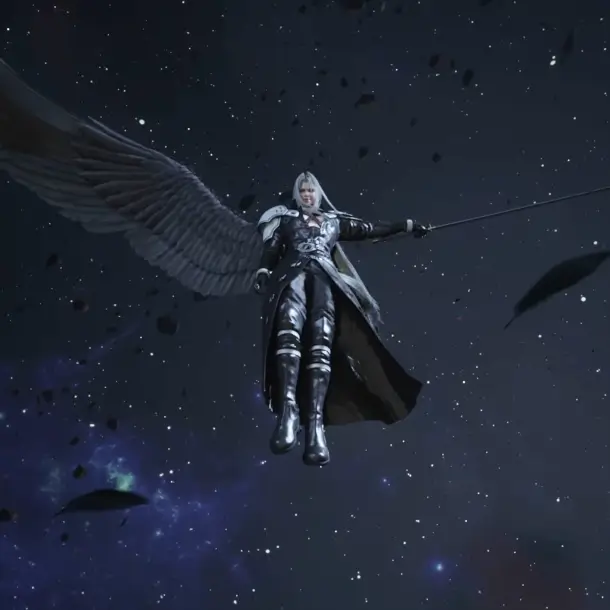
Boss: Sephiroth (Final)
Cloud takes center stage in this fight, with Aerith providing crucial support. Utilize Protect and Haste when your ATB bar allows, but prioritize healing and building Synergy.
Sephiroth unleashes a fury of attacks. Be wary of his “Grip of Fate” projectile followed immediately by “Skewer.” Time your dodges perfectly, and remember you can heal a character caught in Skewer’s animation. Mastering Perfect Guards against Sephiroth’s standard attacks significantly increases his Stagger meter, leaving him vulnerable.
Just like in your previous encounter, Sephiroth utilizes “Heartless Angel,” reducing your party to 1 HP. Respond swiftly with Magnify+Curaga, Giga Potions, or Aerith’s “Healing Wind” Limit Break. Consider summoning Phoenix for its Reraise ability on Cloud for an extra layer of security.
Prepare to face “Octoslash” once more. Dismantle Masamune with Aerith’s “Ray of Judgement” to pressure Sephiroth. When his health dwindles, brace yourself for “Tempus Finis.” Here, Sephiroth shoots beams that slowly track you. Constant movement is crucial.
Once your Limit Level reaches 3, unleash your Limit Break. This potent attack should be enough to bring Sephiroth down. Congratulations! You’ve conquered the one-winged angel and completed the game.
The journey doesn’t end here. Replay any chapter or challenge yourself on Hard Mode. The game offers even tougher battles to unlock, perfect for seasoned players. Additionally, the Combat Simulator allows you to play as Zack or Sephiroth for a fresh perspective on combat.
So, gear up, strategize, and prepare to face the trials that await in the world of Final Fantasy 7 Rebirth!
Related: