Encountering the “Access Denied” error in Windows 11 can be an unsettling experience. It feels like the very system you own is blocking you from your own files. Fortunately, regaining access often requires just a few steps.
What is Access Denied” Error in Windows 11?
This error pops up when your user account lacks the necessary permissions to access a specific file, folder, or directory. It’s like being denied entry without proper authorization. This can happen due to various reasons:
- Unauthorized User Account: You might be using an account without the required permissions.
- Ownership Issues: Someone else might own the file or folder, restricting your access.
- File Encryption: Encrypted files need specific decryption keys for access.
- Overzealous Antivirus: Your antivirus software might be mistakenly blocking access.
How to Fix
Here are three solutions you can try:
1. Check File Permissions
- Right-click on the inaccessible file or folder and select Properties.
- Go to the Security tab and click Edit.
- Locate your username in the list and ensure the Full control checkbox is selected under the Allow column in the Permissions for user section.
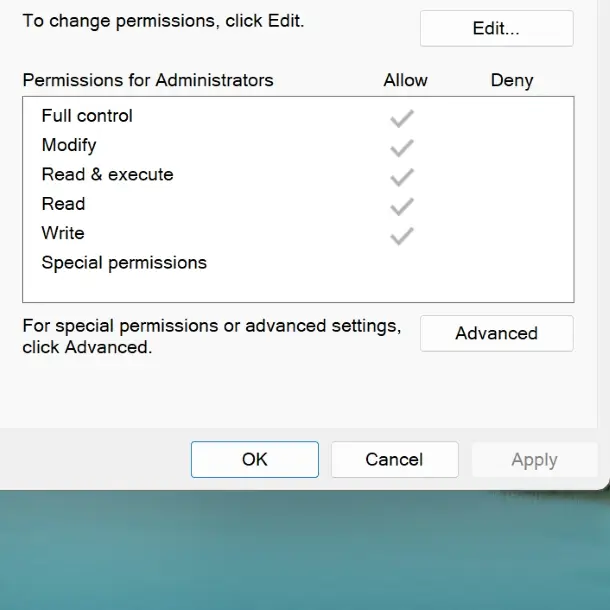
- Click OK to save changes.
Note: If your username is missing, you’ll need to add it manually and then modify the permissions.
2. Enable (and then Disable) the Hidden Administrator Account (Use with Caution)
- Press Win + S to open Windows search.
- Type CMD, right-click on Command Prompt, and select Run as administrator.
- In the Command Prompt, enter the following command and press Enter:
net user administrator /active:yes - This will unlock the hidden administrator account.
- Log off your current account and switch to the newly enabled Administrator account.
- Using the Administrator account, you shouldn’t encounter access problems due to its elevated privileges.
- Once you’ve completed your tasks, log off the Administrator account and switch back to your main account.
- Repeat steps 1 and 2, then enter this command and press Enter:
net user administrator /active:no - This will disable the Administrator account again.
Important Note: Enabling the Administrator account grants extensive privileges and should be used cautiously. Only enable it when necessary and disable it immediately afterwards to maintain system security.
3. Set Your Account to Administrator
- Press Win + R to open the Run dialog.
- Type control userpasswords2 and click OK.
- Check the box next to Users must enter a username and password to use this computer (if available).
- Select your account and click Properties.
- Go to the Group Membership tab and choose Administrator from the menu.
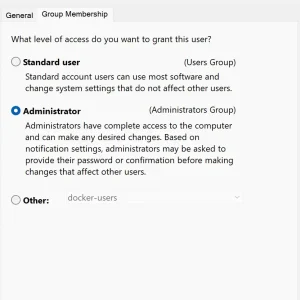
- Click Apply and OK.
- Restart your computer and check if the issue persists.
4. Taking Ownership
Using the Graphical Interface
- Right-click the problematic file or folder and choose Properties.
- Go to the Security tab and click Advanced.
- In the Owner section, click Change.
- Type your username or Administrators in the Enter the object name field.
- Click Check Names and OK to save.
- Click Apply and OK in the main window.
Using Command Prompt
- Open Command Prompt as administrator (search “CMD” and right-click “Run as administrator”).
- Type (replace “path_to_folder” with the actual path):
takeown /f "path_to_folder" /r /d y
icacls "path_to_folder" /grant administrators:F /t
(Right-click the file/folder, select “Copy as path” to get the path.)
- Restart your computer.
5. Disable Third-Party Antivirus (Temporary)
If the issue persists, consider temporarily disabling your third-party antivirus program. If access is granted upon disabling, your antivirus might be interfering. Consider using the built-in Windows Defender or switching to a different antivirus software.
By following these steps, you should be able to overcome the “Access Denied” error and regain access to your files and folders in Windows 11.
Related: