Pre-installed apps, often called “bloatware,” can clutter your Windows 11 experience and use up valuable storage space. Don’t worry, you’re not stuck with them! Here’s how to reclaim your digital space and get rid of unwanted software:
Understanding Bloatware
Bloatware refers to apps pre-installed on your PC by either Microsoft or your device manufacturer that you might not need or use. These can range from Microsoft apps like Teams or Calendar to third-party utilities you didn’t ask for. Remember, just because it’s pre-installed doesn’t mean you have to keep it!
How to Get Rid of Bloatware on Windows 11
Uninstalling with Windows 11 Settings
- Press Win + I or click the gear icon on the Start menu.
- Click Apps in the sidebar, followed by Installed apps.
- Scroll through the list or use the search bar to locate the app you want to remove.
- Once you find it, click the three-dot menu next to the app name.
- Click Uninstall and confirm your choice in the pop-up window.
Note: Some essential system apps like Photos and Microsoft Store cannot be removed this way.
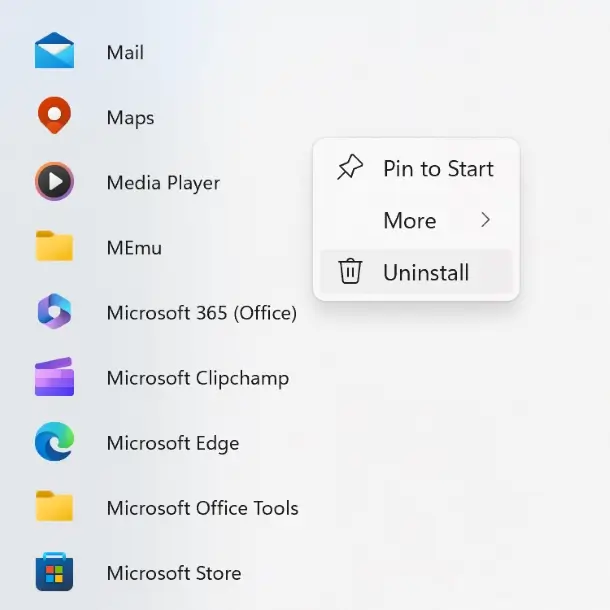
Uninstalling from the Start Menu
This method is ideal for a quick removal of one or two apps:
- Click the Start button or press the Windows key.
- Click All apps in the top right corner.
- Scroll through the list or search for it using the search bar.
- Right-click the app and choose Uninstall. Confirm the removal in the pop-up window.
Leveraging Win11Debloat
This third-party script automates the process, making it convenient if you want to remove several apps or if you’re setting up multiple PCs. However, use caution and follow instructions carefully.
- Head to GitHub and download the Win11Debloat script.
- Unzip the downloaded file and double-click Run.bat.
- Windows Defender might warn you. Click More Info and choose Run anyway. Follow User Account Control prompts by clicking Yes.
- In the PowerShell window, choose 1 or 2 to select the bloatware removal method and press Enter.
- The script will provide on-screen instructions. Carefully follow them to ensure successful uninstallation.
Fresh Start with a Clean Install
If your PC came pre-loaded with a ton of bloatware, a clean install of Windows 11 might be the best solution. This wipes your entire system clean, removing all pre-installed apps, including bloatware.
Here’s how to perform a clean install:
- Before proceeding, ensure you have backed up all your important files and data. This is crucial, as a clean install erases everything!
- Open the Settings app and navigate to System > Recovery > Reset PC.
- Choose Remove everything for a complete wipe. Opt for Cloud download for the latest Windows 11 version or Local reinstall if you have internet limitations.

- In the Additional settings window, you can customize your reinstall. Remember, choose Yes, all drives only if you want to erase all data on connected drives (be cautious!).
- Click Reset to begin the process. Your PC will restart and reinstall Windows 11, leaving you with a bloatware-free system.
By following these steps and tips, you can effectively remove bloatware and reclaim your Windows 11 experience, enjoying a cleaner, faster, and more efficient system.
Related: