Want to unlock faster performance for your development projects? Windows 11’s Dev Drive is here to help! This guide breaks down everything you need to know, from understanding its benefits to setting it up in a few simple steps.
What’s a Dev Drive?
Think of it as a dedicated storage space optimized for developers. It uses the Resilient File System (ReFS) for enhanced performance and stability, while also working seamlessly with Microsoft Defender to minimize its impact on your workflow. The result? Up to 30% faster file I/O operations, giving your development tasks a significant boost.
How to Set Up Dev Drive on Windows 11
Before You Begin
- Ensure you’re running Windows 11 Build 22621.2338 or later.
- Have at least 16GB of RAM (8GB minimum).
- Free up at least 50GB of disk space.
Setup Steps
There are two primary methods for creating a Dev Drive: utilizing unallocated space on an existing drive or creating a Virtual Hard Disk (VHD/VHDX). Here’s a step-by-step guide for both approaches:
Method 1: Unallocated Space on Disk
- Press Win+I to launch the Settings app.
- From the left sidebar, select “System” and then “Storage” on the right.
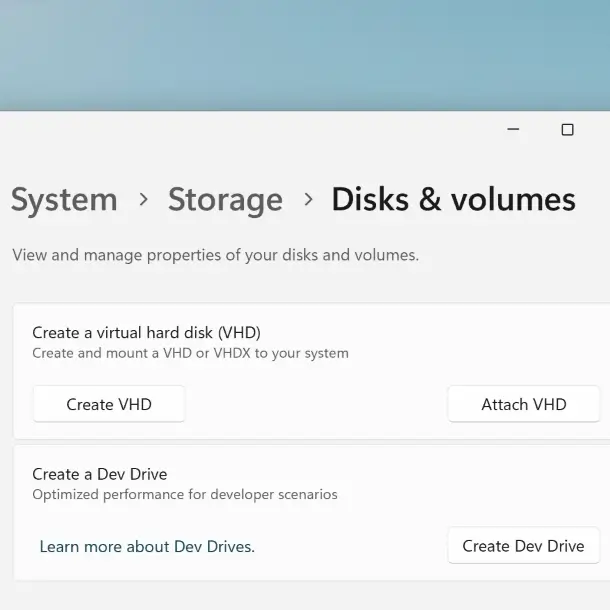
- Expand “Advanced storage settings” by clicking/tapping on it, and then select “Disks & volumes.”
- Click/tap the “Create Dev Drive” button.
- Select the unallocated space you want to use and click “Next.”
- Set the Label (name), Drive Letter, and Size (minimum 50 GB) for your Dev Drive. Click “Format” to finalize.
Method 2: Virtual Hard Disk (VHD/VHDX)
- Open Settings by pressing Win+I on your keyboard.
- Click or tap on “System” on the left side, then select “Storage” on the right side.
- Within the Storage settings, locate and click/tap on “Advanced storage settings” to expand it, then click/tap on “Disks & volumes.”
- Click/tap on the “Create Dev Drive” button.
- Select “Create new VHD” and click/tap on “Next.”
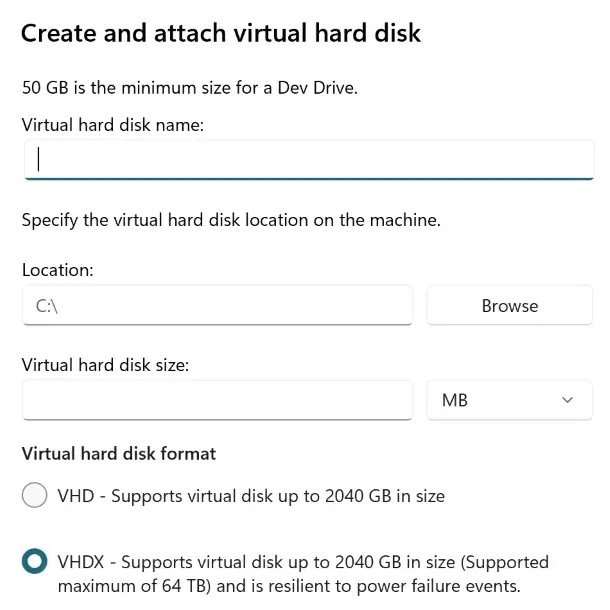
- Follow the prompts to configure your VHD/VHDX:
- Enter the desired name for your Virtual Hard Disk.
- Choose the location where you want to create the VHD/VHDX file.
- Specify the size for the virtual hard disk (must be at least 50GB).
- Select the format (VHD or VHDX) and type (fixed size or dynamically expanding) for your VHD/VHDX.
- Click/tap on “Create.”
- Allow a moment for the system to create and attach (mount) the new virtual hard disk.
- Select either GPT (default) or MBR for the partition style of the VHD/VHDX, and click/tap on “Initialize.”
- Follow these steps to create the Dev Drive on the VHD/VHDX:
- Enter the desired label (drive name) for the Dev Drive.
- Choose an available drive letter for the Dev Drive.
- Specify the size in MB of unallocated space you want to allocate for the Dev Drive (must be at least 50GB).
- Click/tap on “Format.”
- Once formatting is complete, you can close the Settings window.
And you’re done! Your Windows 11 Dev Drive is ready to use. Enjoy optimized performance, reduced security restrictions, and a dedicated space for your development projects.
Related: