While zipping files might not be an everyday task, it’s a valuable skill for any Windows user. Here’s a breakdown of the various methods you can use to compress your files and save space or share them more easily.
How to Zip Files and Folders on Windows 10 & 11
1. The Right-Click Method
This is the simplest way to zip files. Here’s how:
- Open the folder containing the files you want to zip.
- Select the files you want to compress. You can click on individual files or use Ctrl + A to select all files.
- Right-click on any of the selected files.
- Hover over Send to and choose Compressed (zipped) folder.
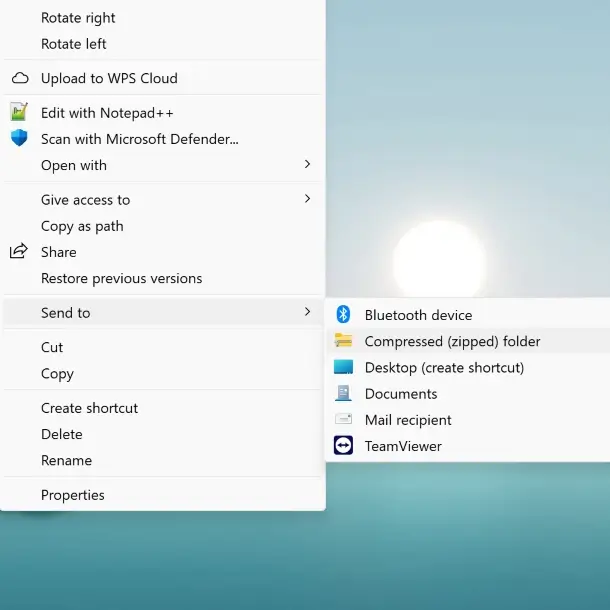
Windows will create a new ZIP file named “Compressed (zipped) folder” in the same location, containing your selected files.
2. Zipping with File Explorer
For a slightly different approach, utilize File Explorer’s built-in options:
Windows 10:
- Open File Explorer and navigate to the folder containing your files.
- Select the files you want to compress.
- Click the Share tab located at the top of the File Explorer window.
- Under the Send section, click on Zip. Windows will create and save a new ZIP file containing your selections.
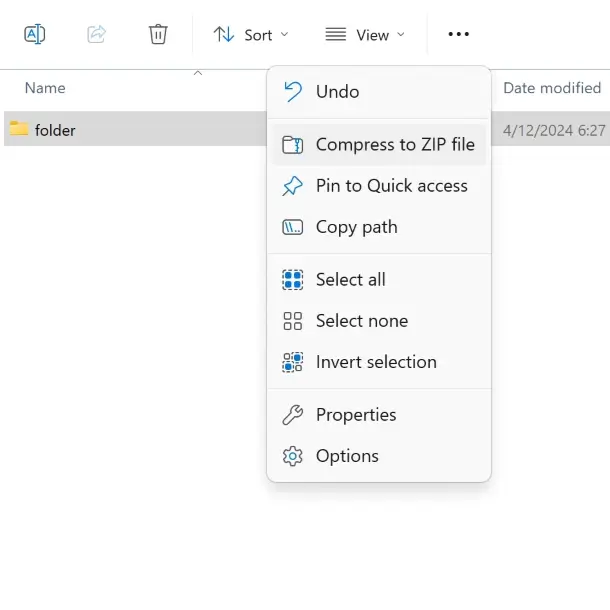
Windows 11:
- Open File Explorer and locate the file(s) or folder you want to compress.
- Select the file(s).
- Click on the three-dot menu in the top ribbon.
- Choose Compress to ZIP file. A new, compressed ZIP file will be created right next to the original file(s).
3. Third-Party Apps
While the built-in Windows tools offer a convenient way to zip files, some users prefer third-party applications that provide additional features. 7-Zip (free and open-source) is a popular option, allowing you to create and extract various archive formats.
- Download and install 7-Zip on your Windows PC.
- Open the 7-Zip application. It will have its own file manager interface.
- Navigate to the folder containing the files you want to compress using the 7-Zip file manager.
- Select the desired files.
- Click the Add button in the top toolbar.
- Choose the output folder, archive format (ZIP in this case), compression level, and optionally set a password for your ZIP archive.
- Click OK. 7-Zip will create and save the compressed ZIP file in your chosen location.
There you have it! With these methods at your disposal, zipping files on Windows becomes a breeze. Whether you prefer the built-in context menu or the additional options offered by 7-Zip, you can easily compress your files for storage or sharing.
Related: